Guides, Integrations, AWS
How to connect AWS to Warden9

Warden9 ships AWS as a built-in integration with 2,972 tools spanning S3, EC2, Lambda, IAM, DynamoDB, RDS, CloudWatch, and 30+ other services. Connecting it gives your agents governed access to your AWS account — every call risk-classified and policy-checked — without ever handing the model a credential.
Unlike an OAuth integration, AWS authenticates with a pair of IAM access keys. So the flow has two halves: first you create a dedicated IAM user in the AWS console, then you paste its keys into Warden9 once. This guide walks through both. It takes a few minutes.
Before you start
You'll need two things:
- A Warden9 workspace you can sign in to. If you don't have one yet, start free.
- Access to your AWS account's IAM console, with permission to create an IAM user.
A word on credentials before we begin: don't reuse your personal keys or a root account. Create a dedicated, least-privilege IAM user whose keys do only what the tools you enable require. That's exactly what we'll do below.
Part 1 — Create an IAM user in AWS
Step 1 — Open IAM and create a user
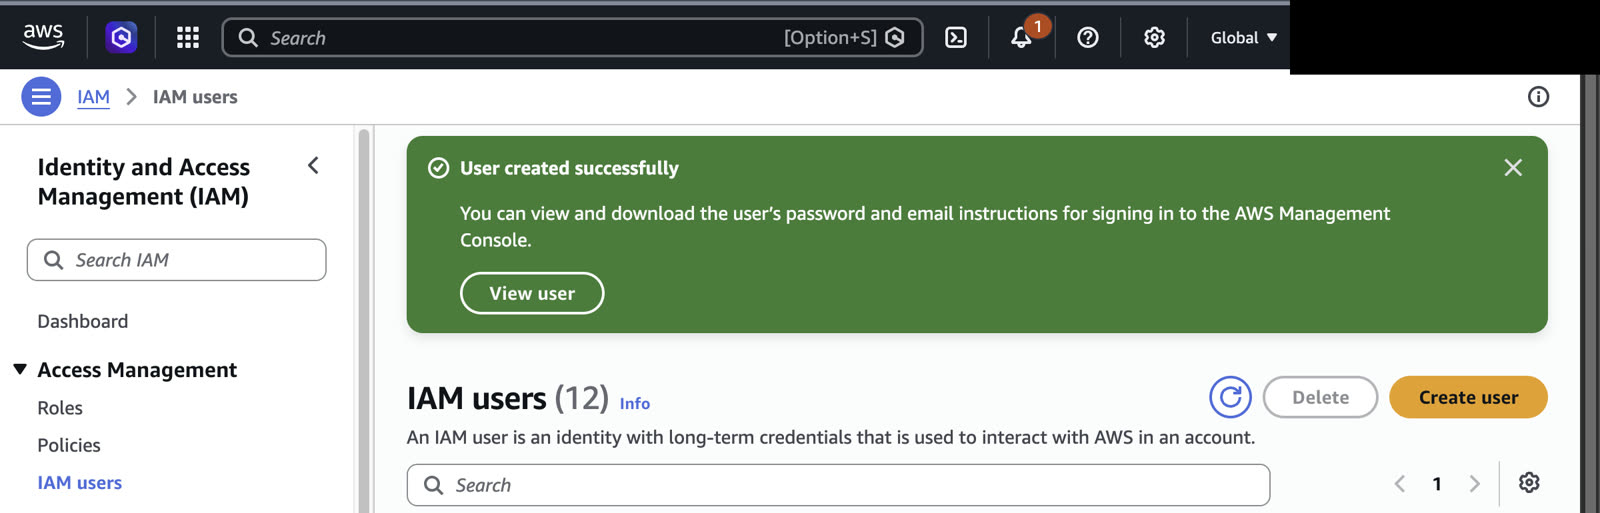
In the AWS console go to IAM → Users → Create user. Give the user a clear name like warden9-gateway and leave Provide user access to the AWS Management Console unchecked — this is a programmatic user that only ever uses access keys.
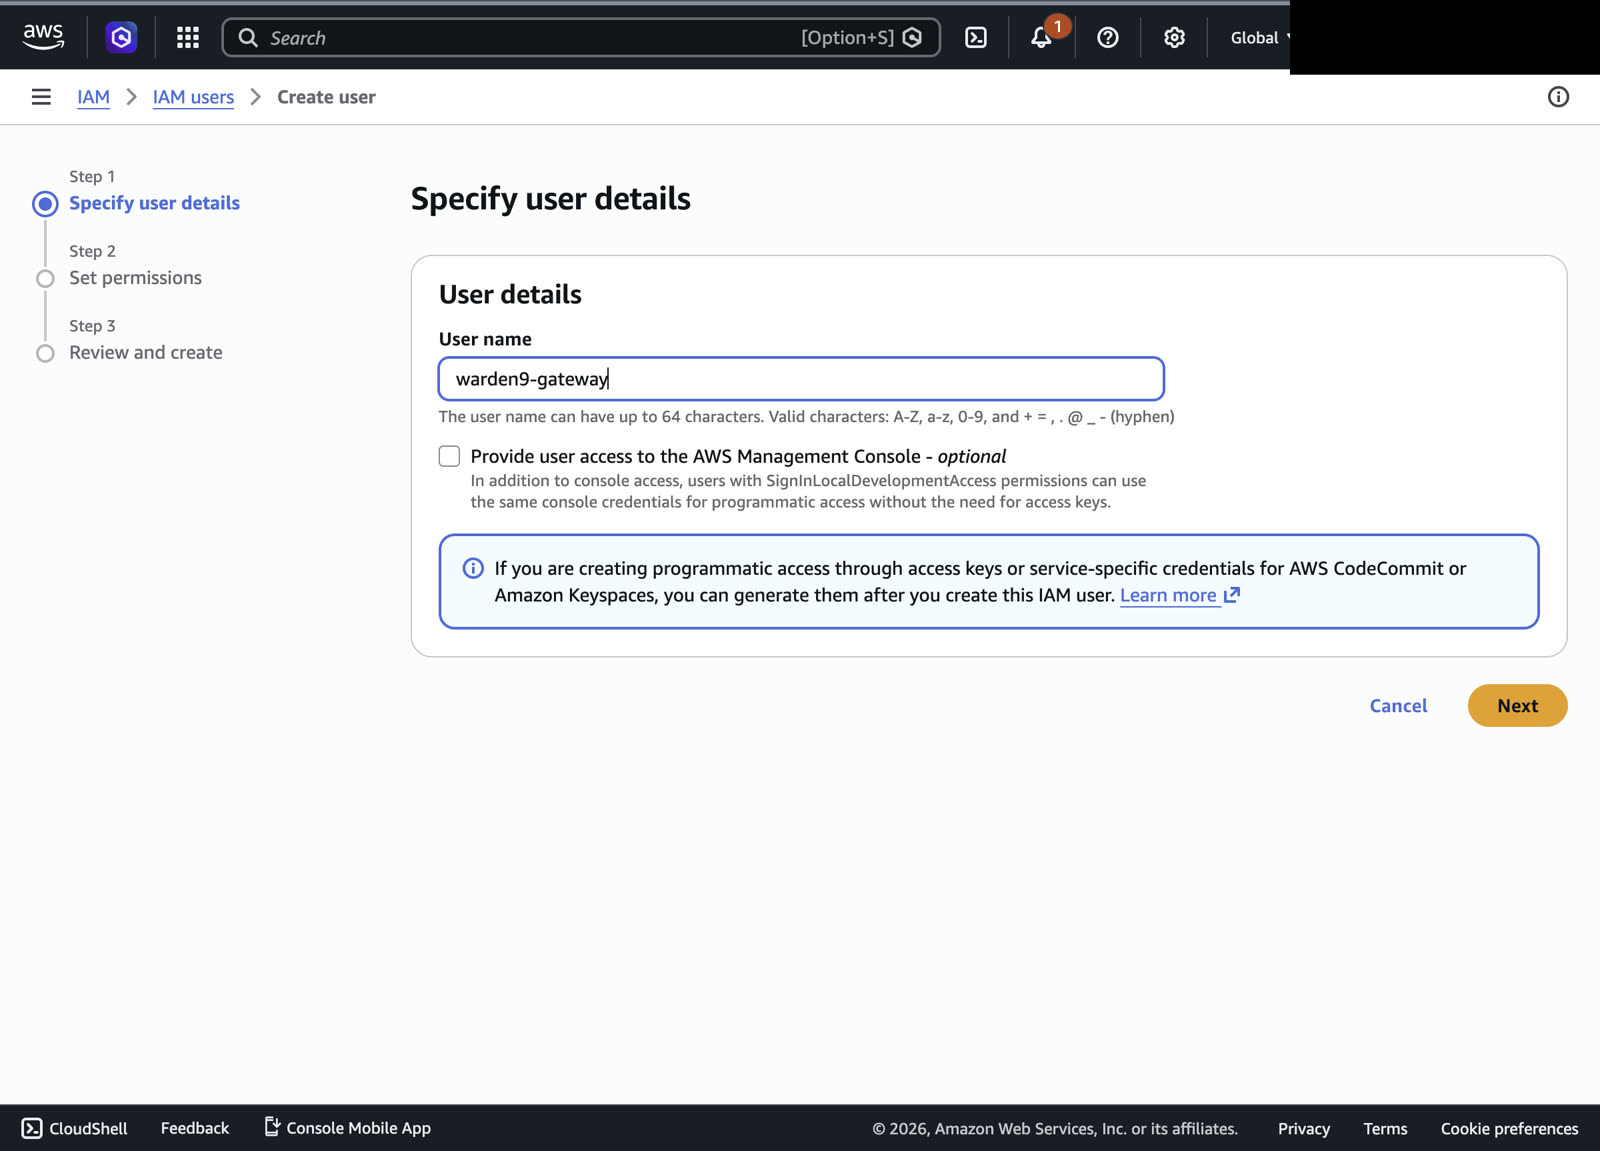
Step 2 — Set permissions
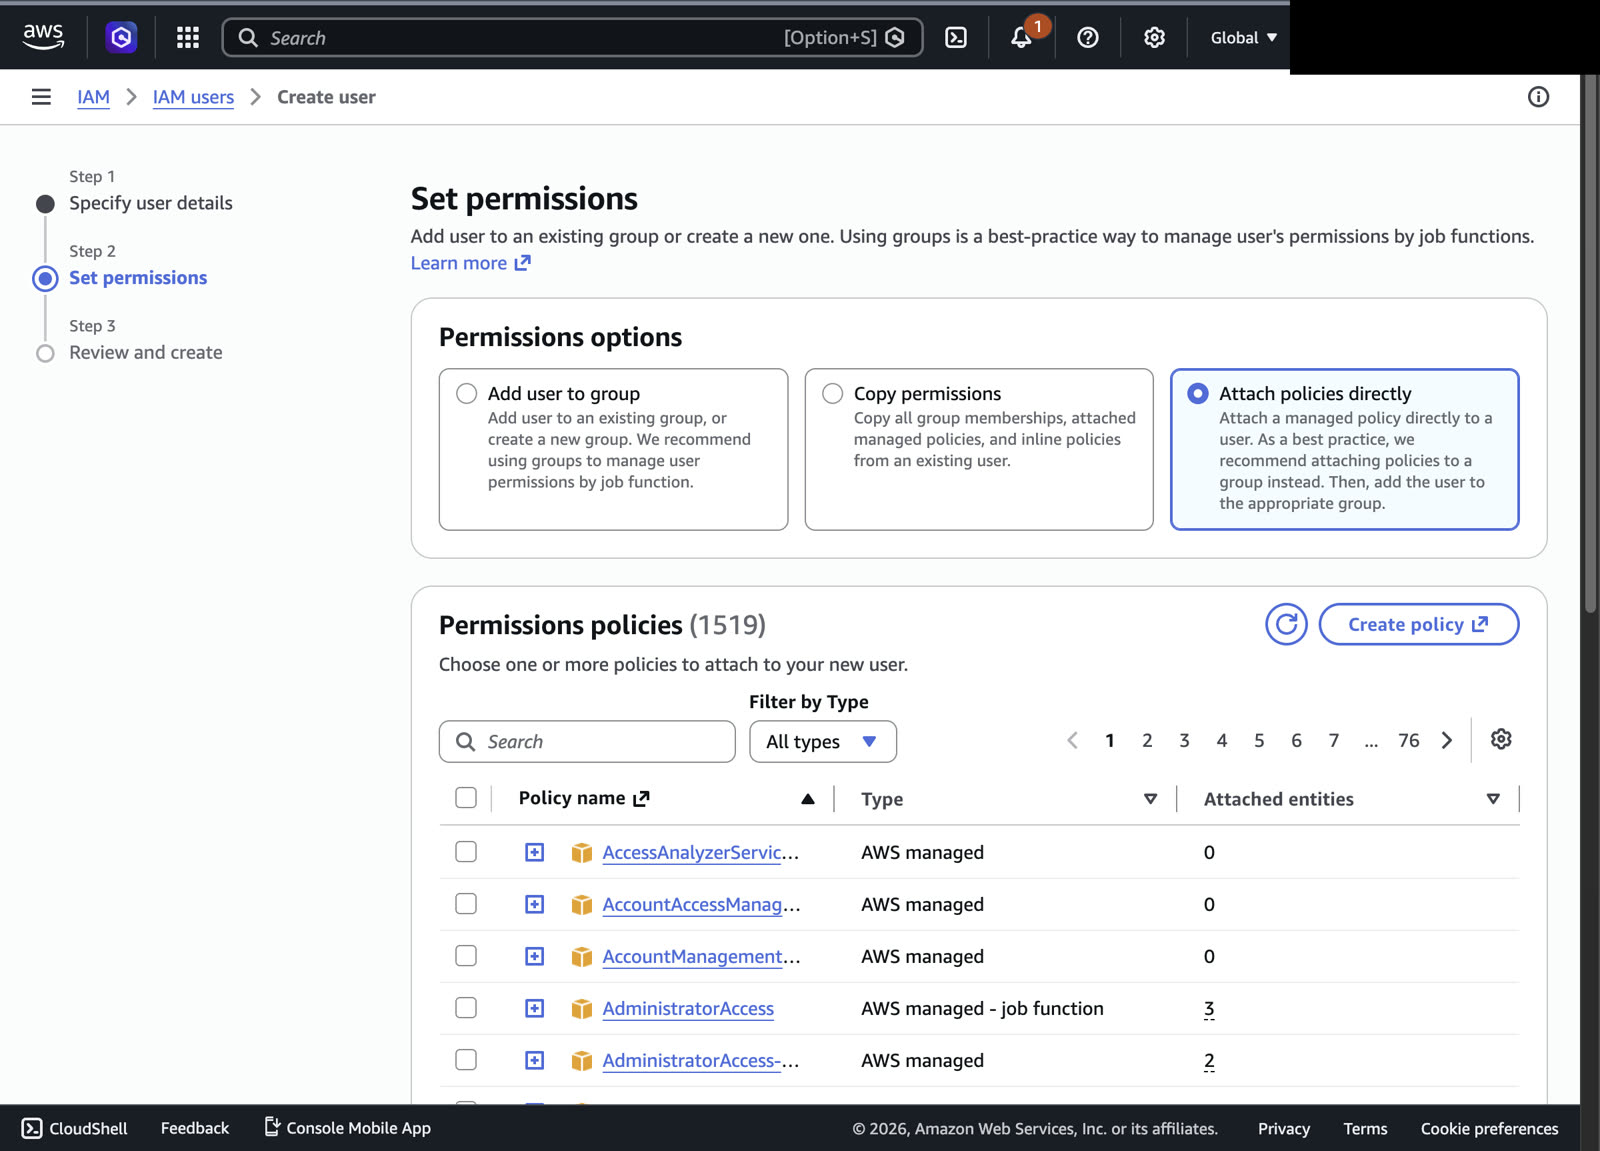
On the Set permissions step choose Attach policies directly. We'll attach a tightly-scoped policy to this user in the next step, so you don't need to pick a broad managed policy here.
Grant only the actions the tools you plan to enable actually need. As a baseline, always include sts:GetCallerIdentity — Warden9 uses it to verify the connection. For a minimal, verifiable setup, that single permission is enough to get connected; add S3, EC2, or other actions as you enable those tools.
Step 3 — Attach a least-privilege policy
Finish creating the user, then open it and add an inline policy. Switch the policy editor to JSON and grant just what you need. Here's the minimal policy that lets Warden9 verify the connection:
{
  "Version": "2012-10-17",
  "Statement": [
    {
      "Sid": "Warden9ConnectionTest",
      "Effect": "Allow",
      "Action": "sts:GetCallerIdentity",
      "Resource": "*"
    }
  ]
}
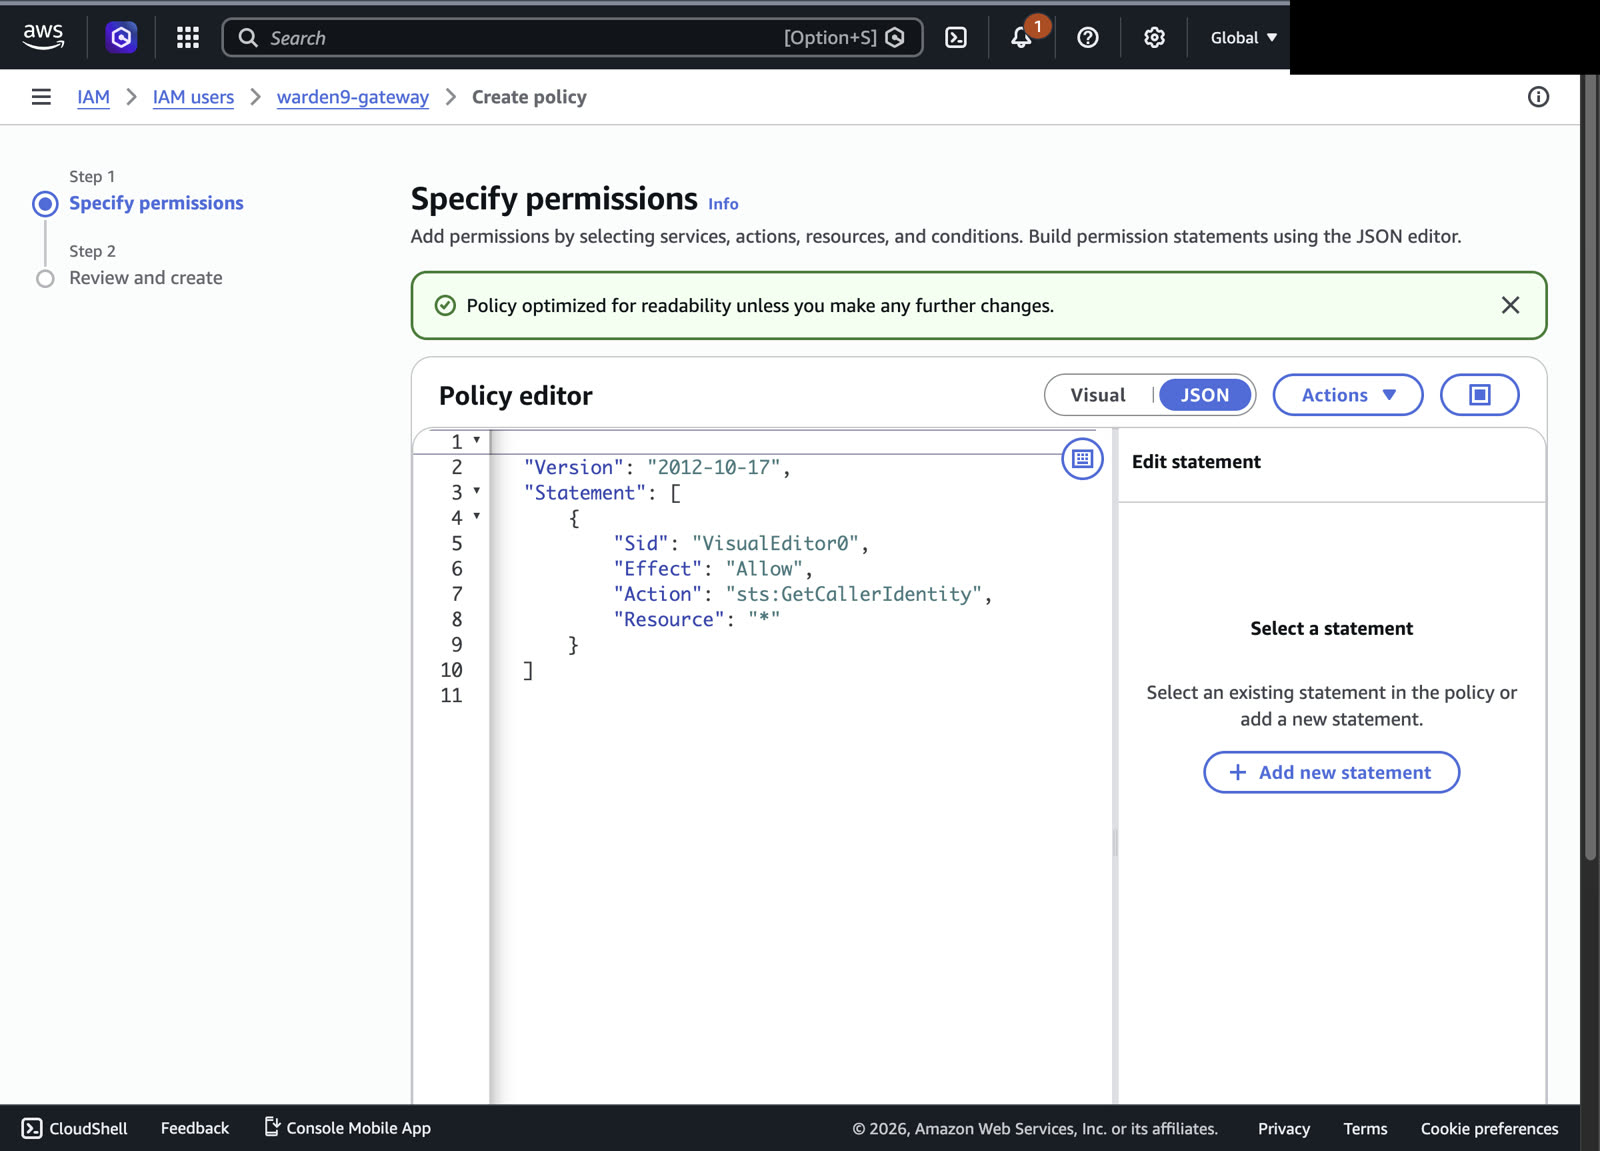
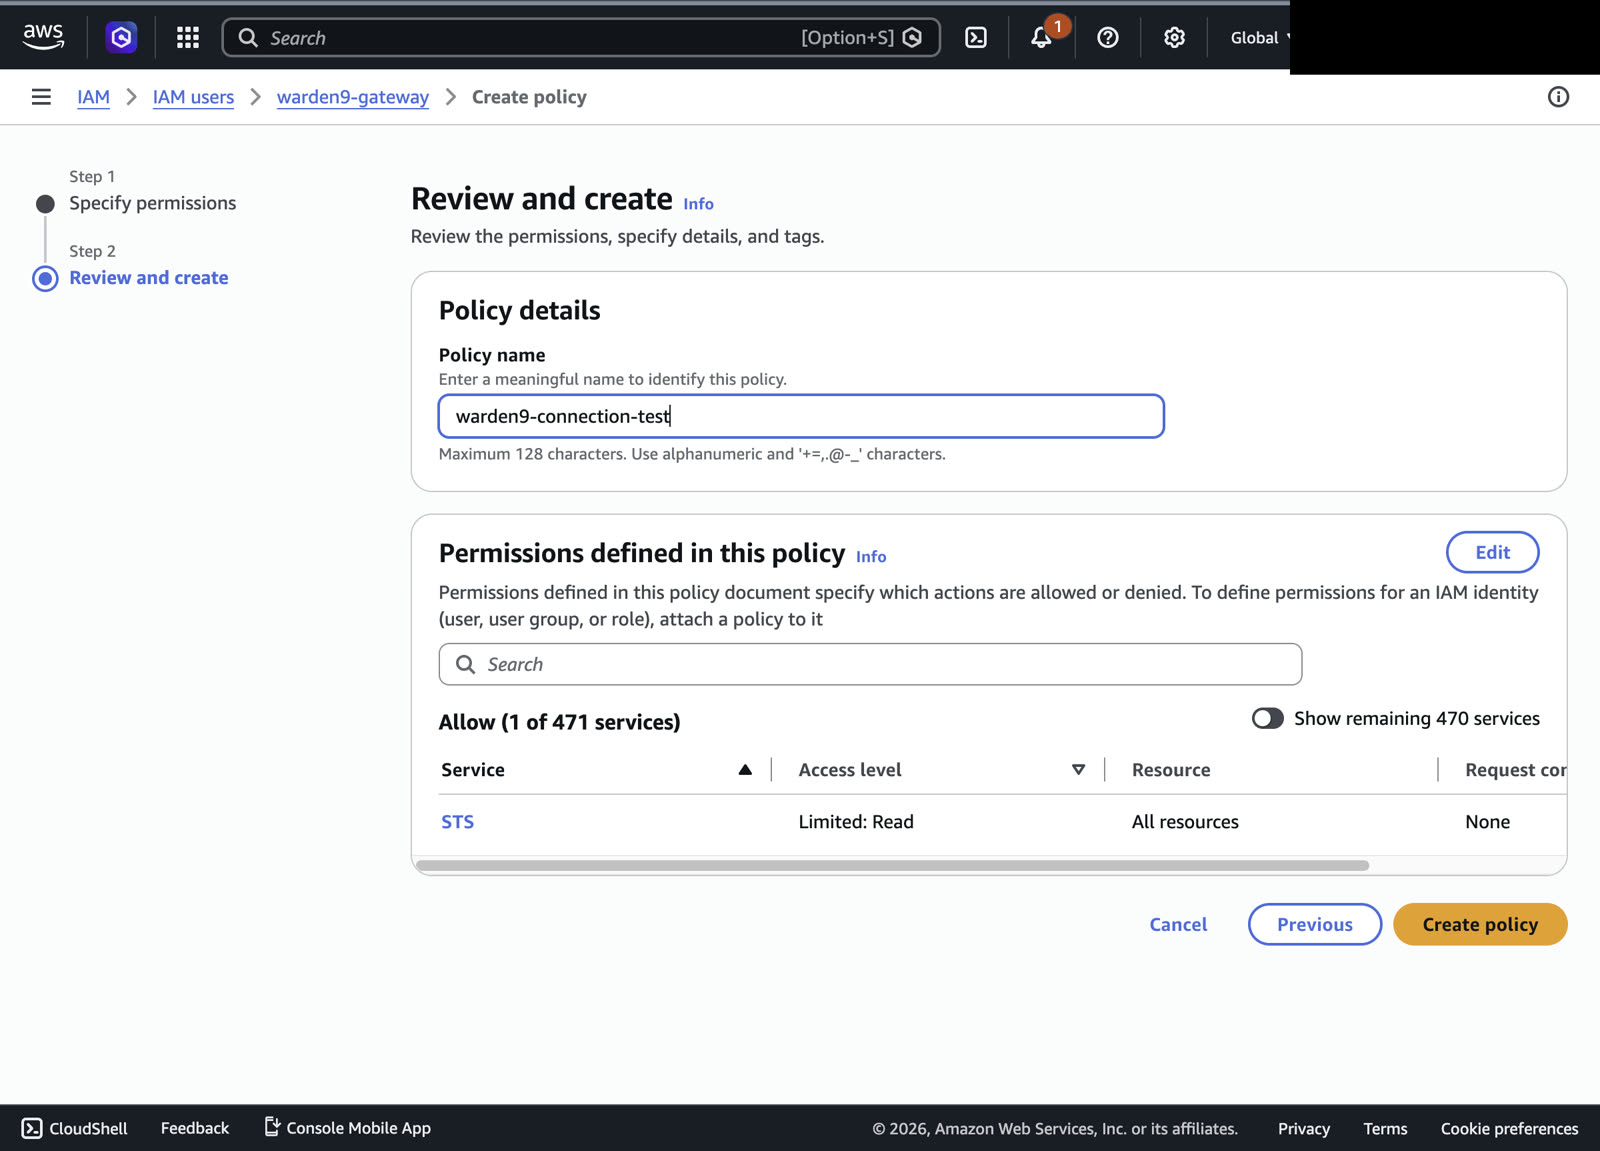
Give the policy a name like warden9-connection-test and review it. AWS summarizes it as a single STS — Limited: Read permission — no write access, no other services.
The user is now created with a scoped policy attached.
Step 4 — Create an access key
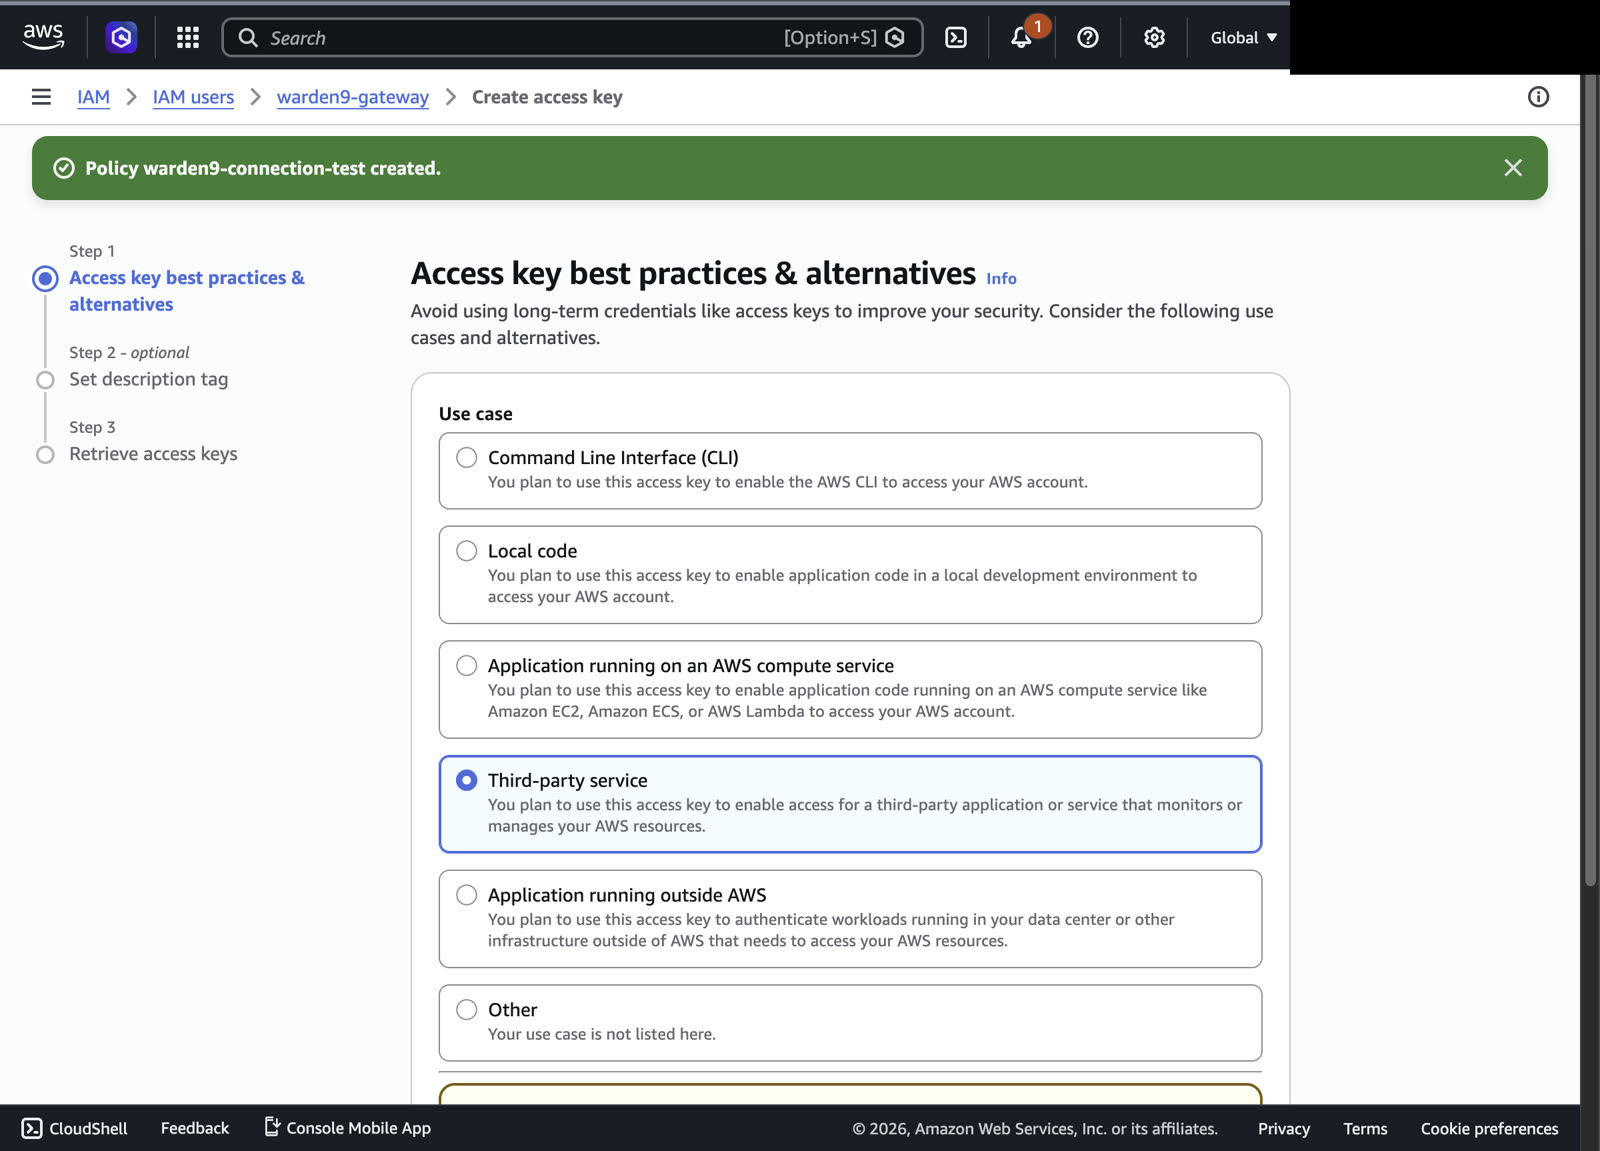
On the user's Security credentials tab, click Create access key. AWS asks how the key will be used — choose Third-party service (Warden9 is a third-party that will call AWS on your behalf) and confirm.
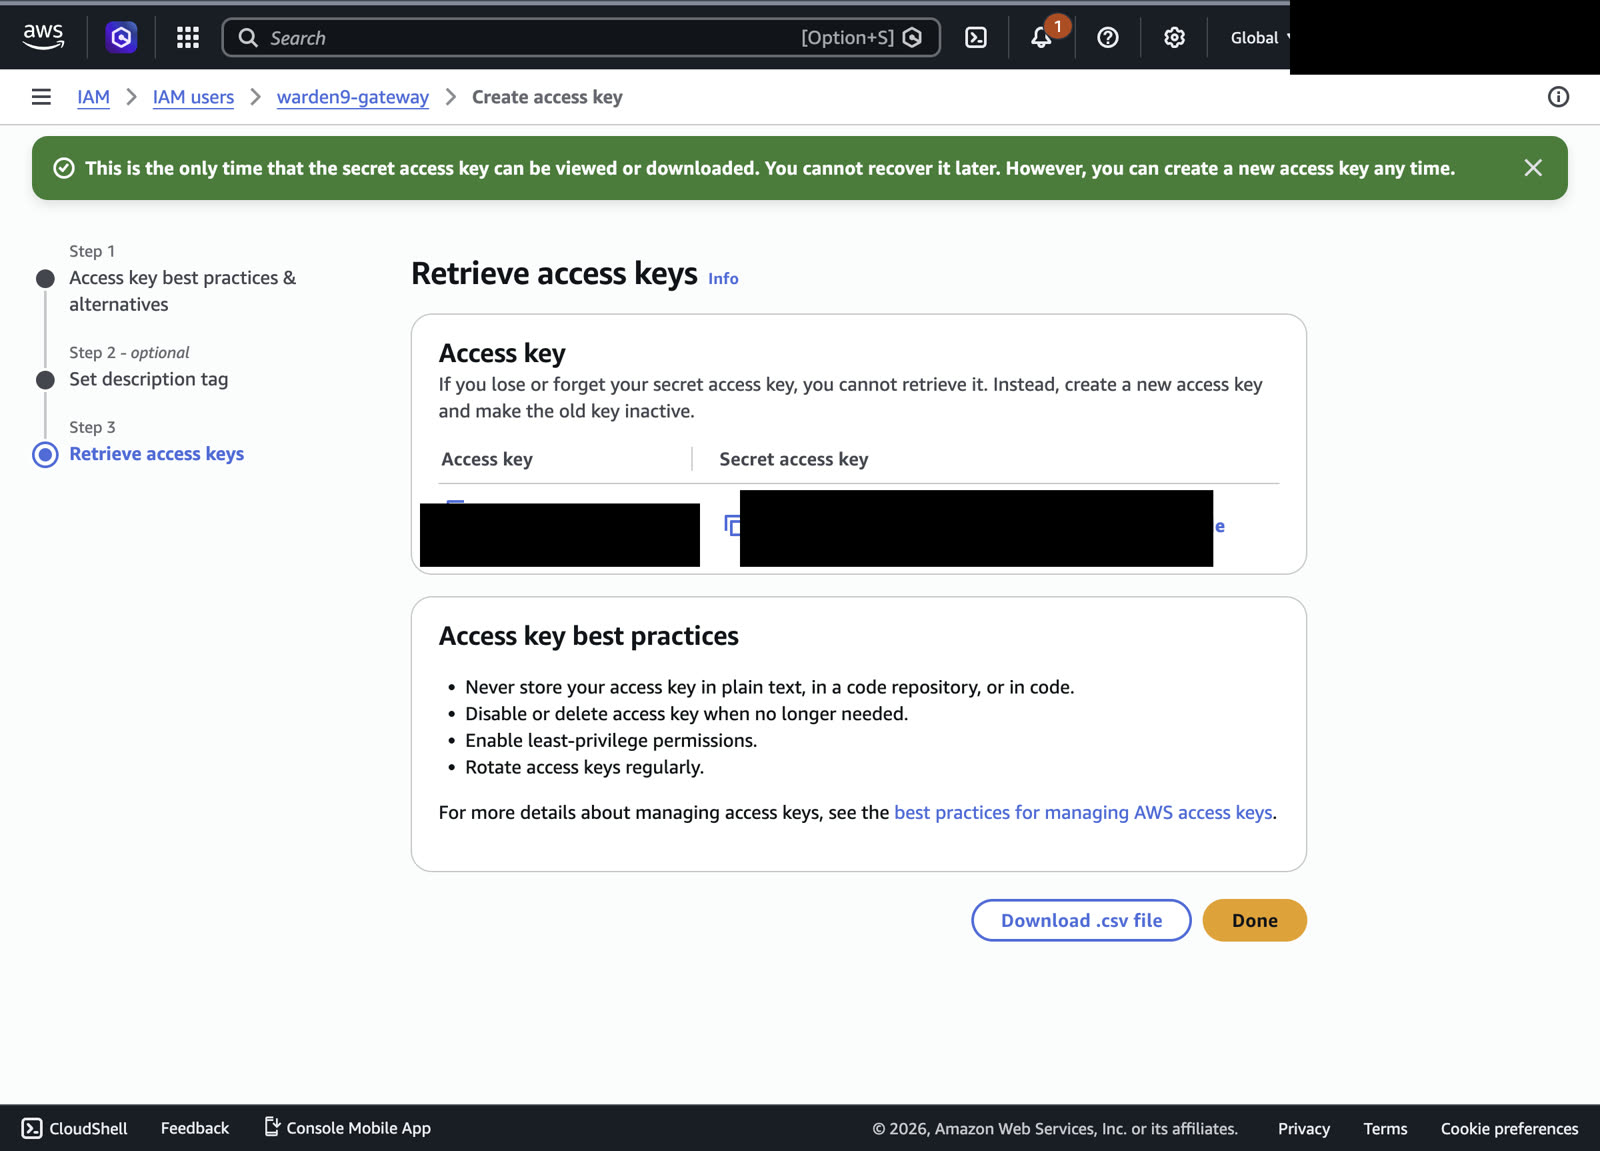
AWS then shows your Access key ID and Secret access key. This is the only time the secret is ever shown — copy both values now (or download the .csv). You'll paste them into Warden9 in the next part.
Part 2 — Connect AWS in Warden9
Step 5 — Open the Connect AWS dialog
In the Warden9 dashboard, open a Gateway (create one if you don't have one yet — it's the governed MCP endpoint your agents point at). In the gateway composer, search the built-in integrations for AWS and click Add.
The Connect AWS dialog opens. It explains exactly what these keys are — an IAM user's access keys, doing only what that user is allowed to do — and recommends the least-privilege setup you just built.
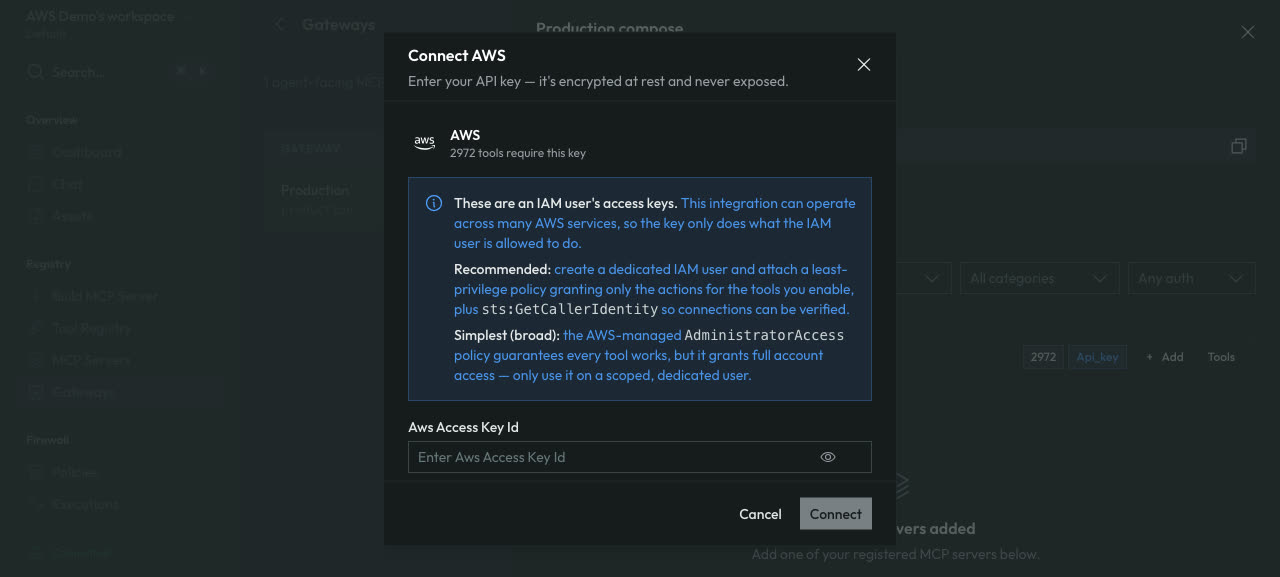
Paste the Access key ID and Secret access key from Step 4. Both fields are masked, and Warden9 encrypts them at rest — they're never shown again or returned to the dashboard.
Step 6 — Test the connection
Click Test connection. Warden9 runs sts:GetCallerIdentity against AWS and, on success, shows the exact IAM user ARN it authenticated as — for our example:
Connection verified. arn:aws:iam::************:user/warden9-gateway
Seeing your own warden9-gateway ARN come back confirms the keys work and are scoped to the user you created. Click Connect to save.
Step 7 — Confirm the connection
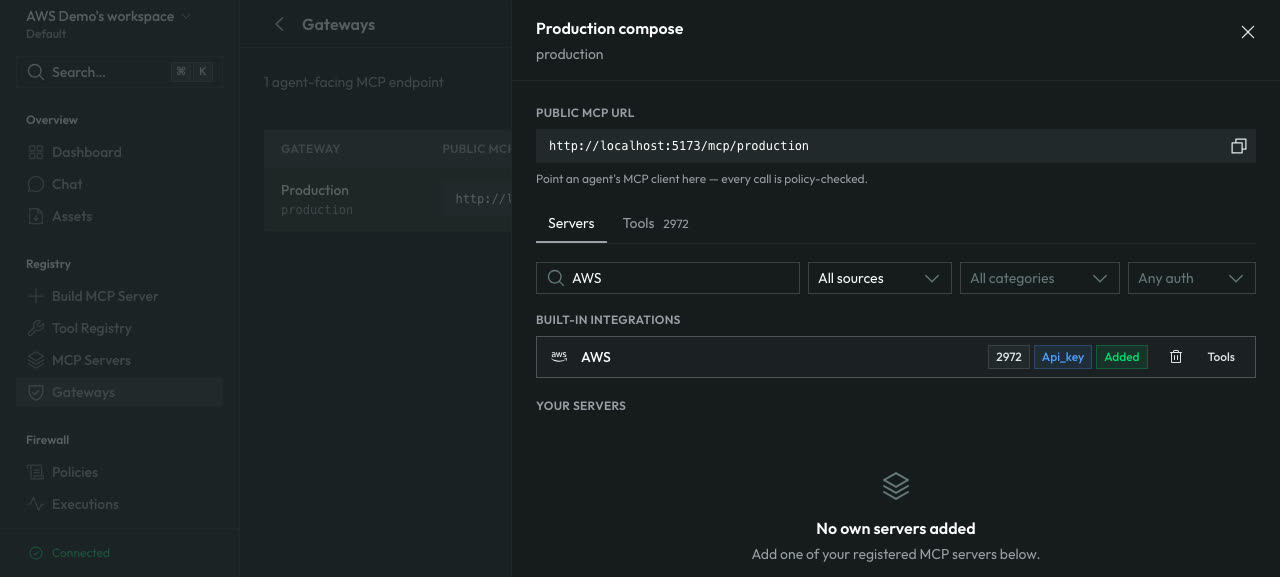
AWS now appears on your gateway with an Added badge and its full tool count. All 2,972 AWS tools are live behind your governed MCP endpoint.
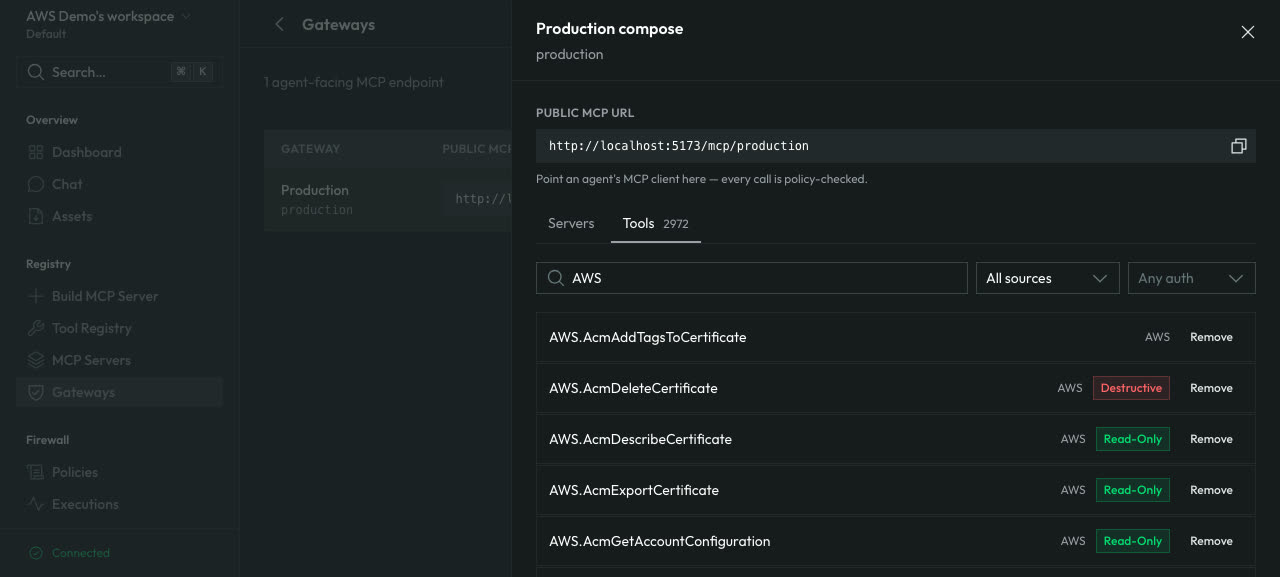
Open the Tools tab and you'll see every AWS action, each already risk-classified: read-only calls like DescribeCertificate are tagged Read-Only, while destructive calls like DeleteCertificate are tagged Destructive so your policies can treat them differently.
That's it — AWS is connected.
What happens to your keys
This is the part that matters for security. When you connect AWS:
- Keys are encrypted at rest. Warden9 stores your access key ID and secret access key encrypted; they are never written to logs or returned to the dashboard.
- The model never sees a credential. When an agent calls an AWS tool, Warden9 signs the request with AWS Signature V4 at the moment of the call, inside the runtime. The keys never enter the prompt, the model's context, or your application code.
- Every call is scoped and governed. Your IAM policy caps what the keys can do at the AWS layer, and Warden9 runs each tool call through its risk classifier and policy pipeline — so a connected account never means unchecked access.
Disconnecting
To revoke access, remove the AWS integration from the gateway in Warden9 — the stored keys are deleted immediately. For a belt-and-braces revoke, also deactivate or delete the access key on the warden9-gateway user in the AWS IAM console.
Frequently asked questions
Do I need to give Warden9 AdministratorAccess?
No. Grant only the actions the tools you enable require, plus sts:GetCallerIdentity so the connection can be verified. AdministratorAccess guarantees every one of the 2,972 tools works, but it grants full account access — only ever attach it to a dedicated, scoped user, never your root or personal account.
Which AWS services can agents access?
S3, EC2, Lambda, IAM, STS, DynamoDB, RDS, SQS, SNS, ECS, ECR, EKS, CloudWatch, CloudFormation, Route 53, Secrets Manager, KMS, SSM, CloudTrail, Bedrock, and 30+ services in total — 2,972 tools. Warden9 classifies each tool's risk so you can allow, deny, or require approval per action.
Does the agent ever see my AWS keys?
Never. The keys are held encrypted by the Warden9 runtime and used only to sign outbound AWS API requests at call time. The model only ever asks the runtime to make a call — it never handles the credential.
What region do calls use?
Calls default to us-east-1, or the AWS_REGION you set on the connection, and most tools also accept a per-call region parameter so a single connection can operate across regions.
Can I use temporary (STS) credentials?
Yes. If you supply a session token alongside your keys, Warden9 will use it — handy for role-assumed, short-lived credentials.
Want to see governed agents acting on AWS in production? Start free or
book a demo.