Guides, Integrations, GitHub
How to connect GitHub to Warden9

Warden9 lets your agents act on real systems on behalf of your end users. Connecting GitHub is how you give an agent scoped access to repositories, issues, pull requests, Actions workflows, gists, and organization membership — without ever handing the model a credential.
This guide walks through the whole flow, from the Auth Providers page in the dashboard to a live, connected GitHub account. Most teams can finish in under two minutes using Warden9's managed OAuth app; if you need your own consent-screen branding or isolated rate limits, there's a bring-your-own-credentials path too.
Before you start
You'll need two things:
- A Warden9 workspace you can sign in to. If you don't have one yet, start free.
- A GitHub account to connect. This is the account whose repos, issues, and PRs your agents will act on.
GitHub supports two credential modes on Warden9:
| Mode | Best for | Setup |
|---|---|---|
| Managed (recommended) | Getting started quickly | No client ID or secret — just click Connect |
| Bring your own (BYO) | Custom consent branding, org policy, or isolated rate limits | Register a GitHub OAuth App and paste credentials once |
If you configure both, your own credentials always take precedence over the managed default.
Option 1 — Connect with Warden9's managed OAuth app (recommended)
GitHub runs on Warden9's platform-managed OAuth app by default. There's nothing to register in GitHub Settings and no client ID or secret to paste. You just click Connect and approve.
Step 1 — Open Auth Providers
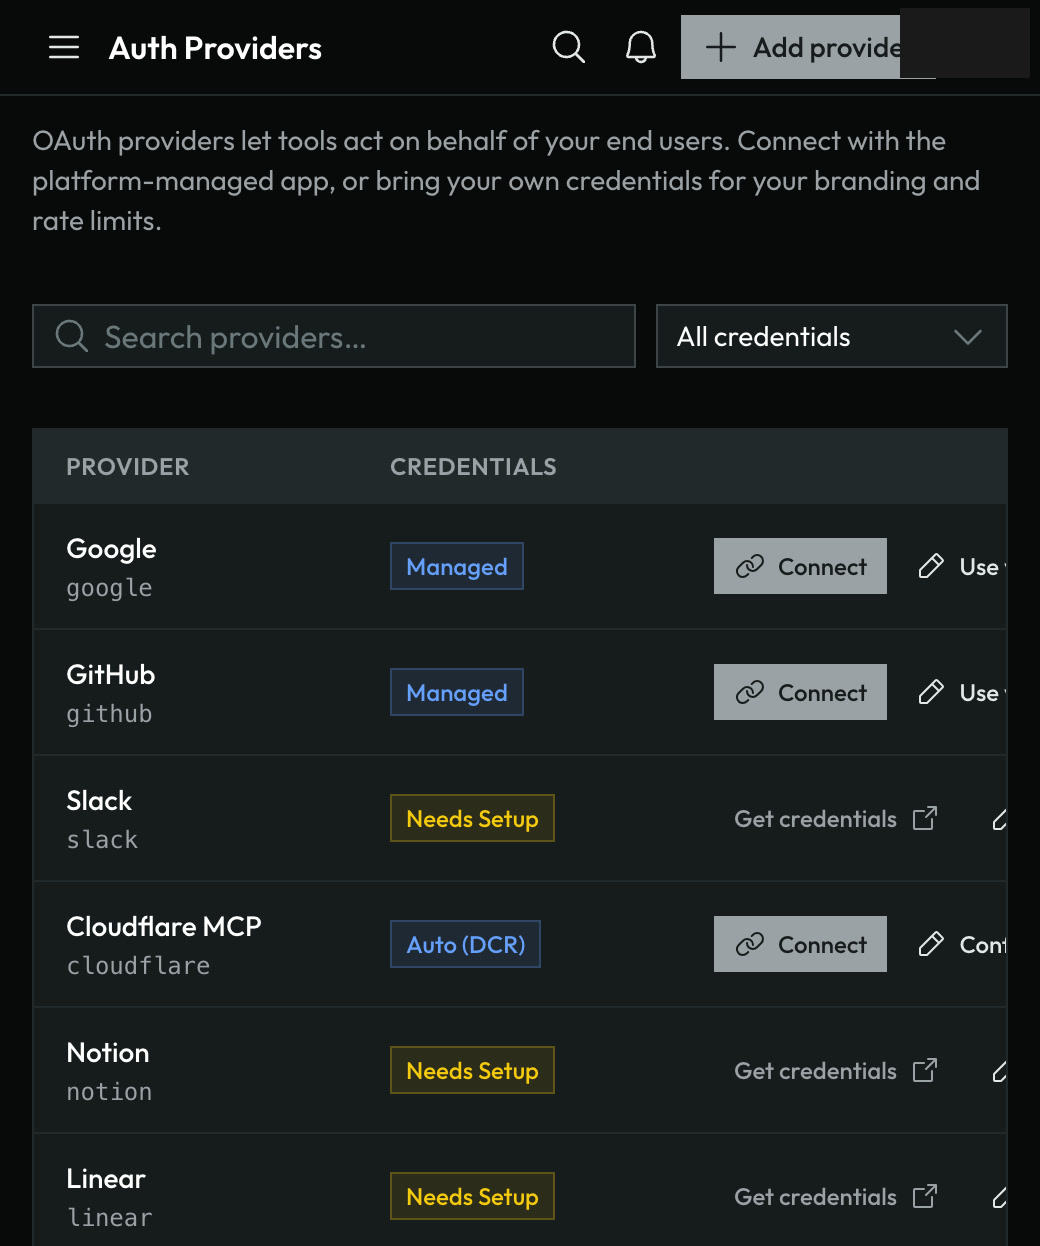
In the dashboard sidebar, go to Configuration → Auth Providers (or press ⌘K / Ctrl+K and search for "Auth Providers").
This page lists every OAuth provider Warden9 supports. Each row shows a credentials badge telling you how it authenticates. GitHub shows a blue Managed badge — that's the platform-managed app, ready to use with no setup.
Step 2 — Click Connect on the GitHub row
Find the GitHub row and click Connect.
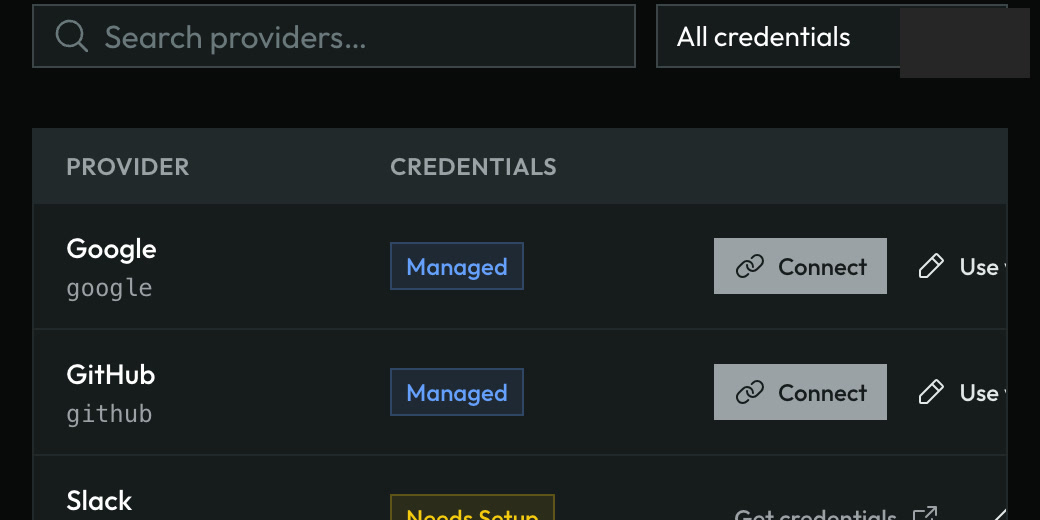
Warden9 asks which end user you're connecting on behalf of. OAuth connections in Warden9 are per-end-user: each of your users gets their own token, so an agent always acts as the right person. For a first connection you can accept the default (default).
A GitHub authorization window then opens.
Step 3 — Sign in and authorize on GitHub
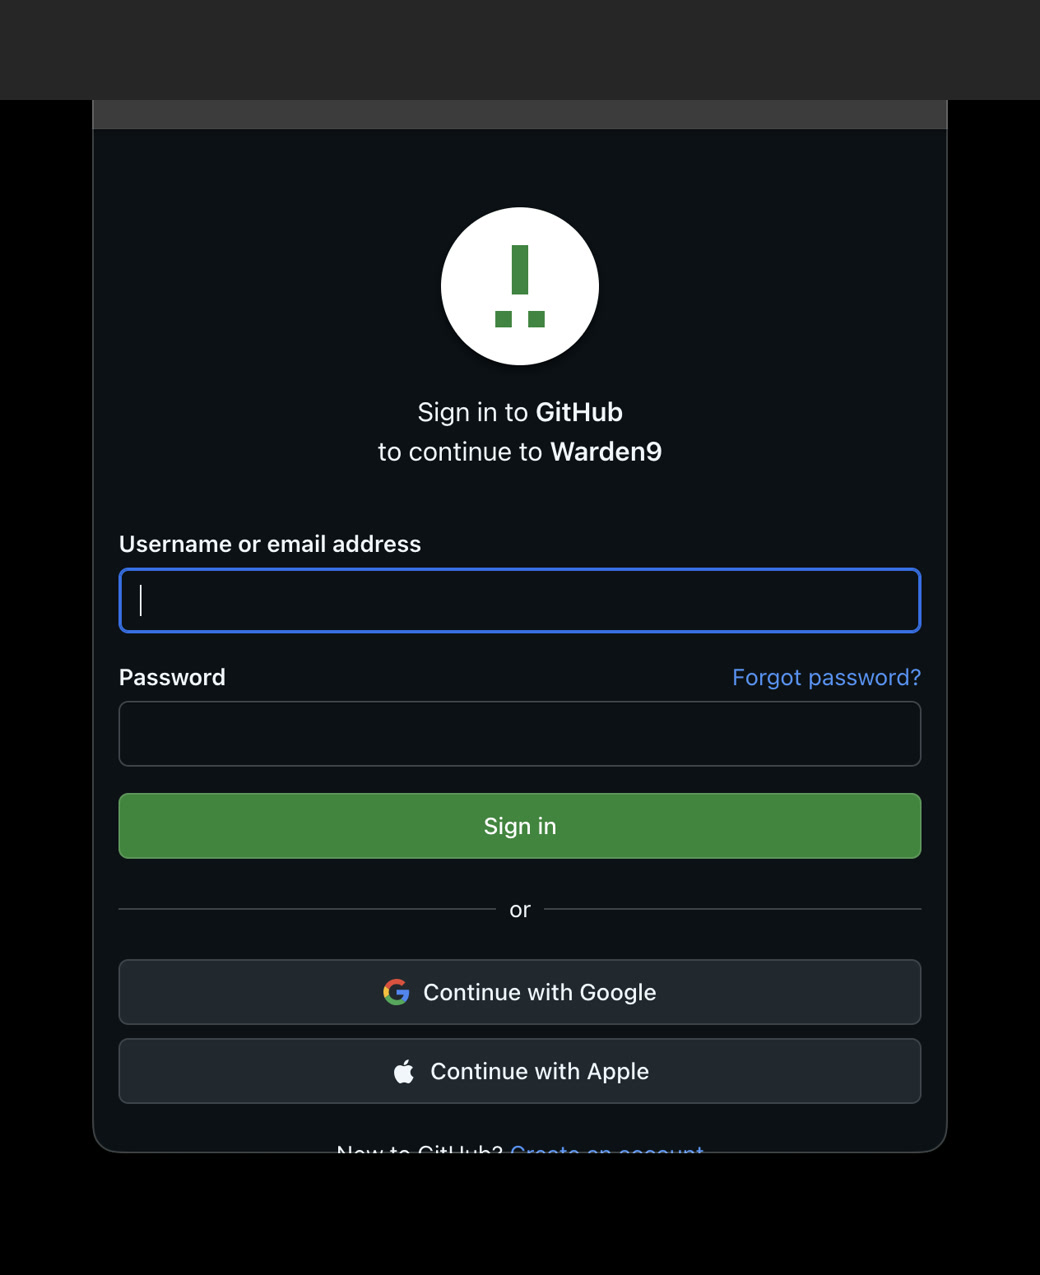
In the GitHub window, sign in if prompted. GitHub shows Sign in to GitHub to continue to Warden9 — use the account whose repos your agents should access.
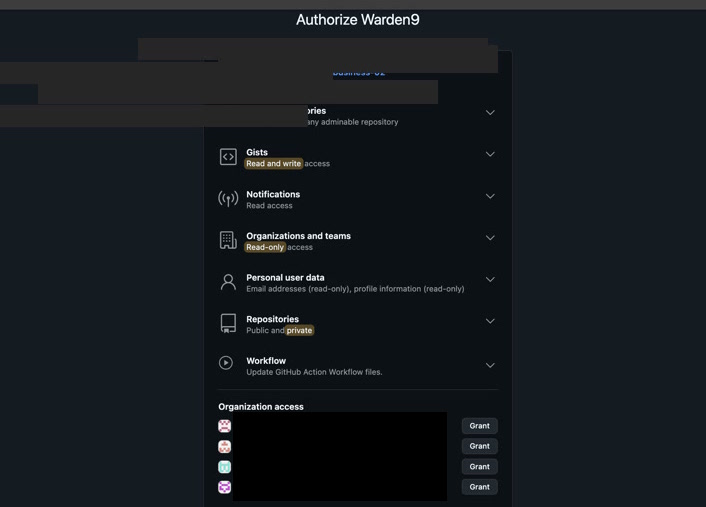
On the next screen, review the permissions Warden9 is requesting — repos, gists, notifications, org membership, and workflow access — and click Authorize.
When you approve, GitHub redirects back to Warden9, the window closes itself, and the token is exchanged and stored automatically.
Step 4 — Confirm the connection
Back on the Auth Providers page, your new connection appears under OAuth Connections. You'll see the provider (GitHub), the end user, a green Connected status, and the granted scopes.
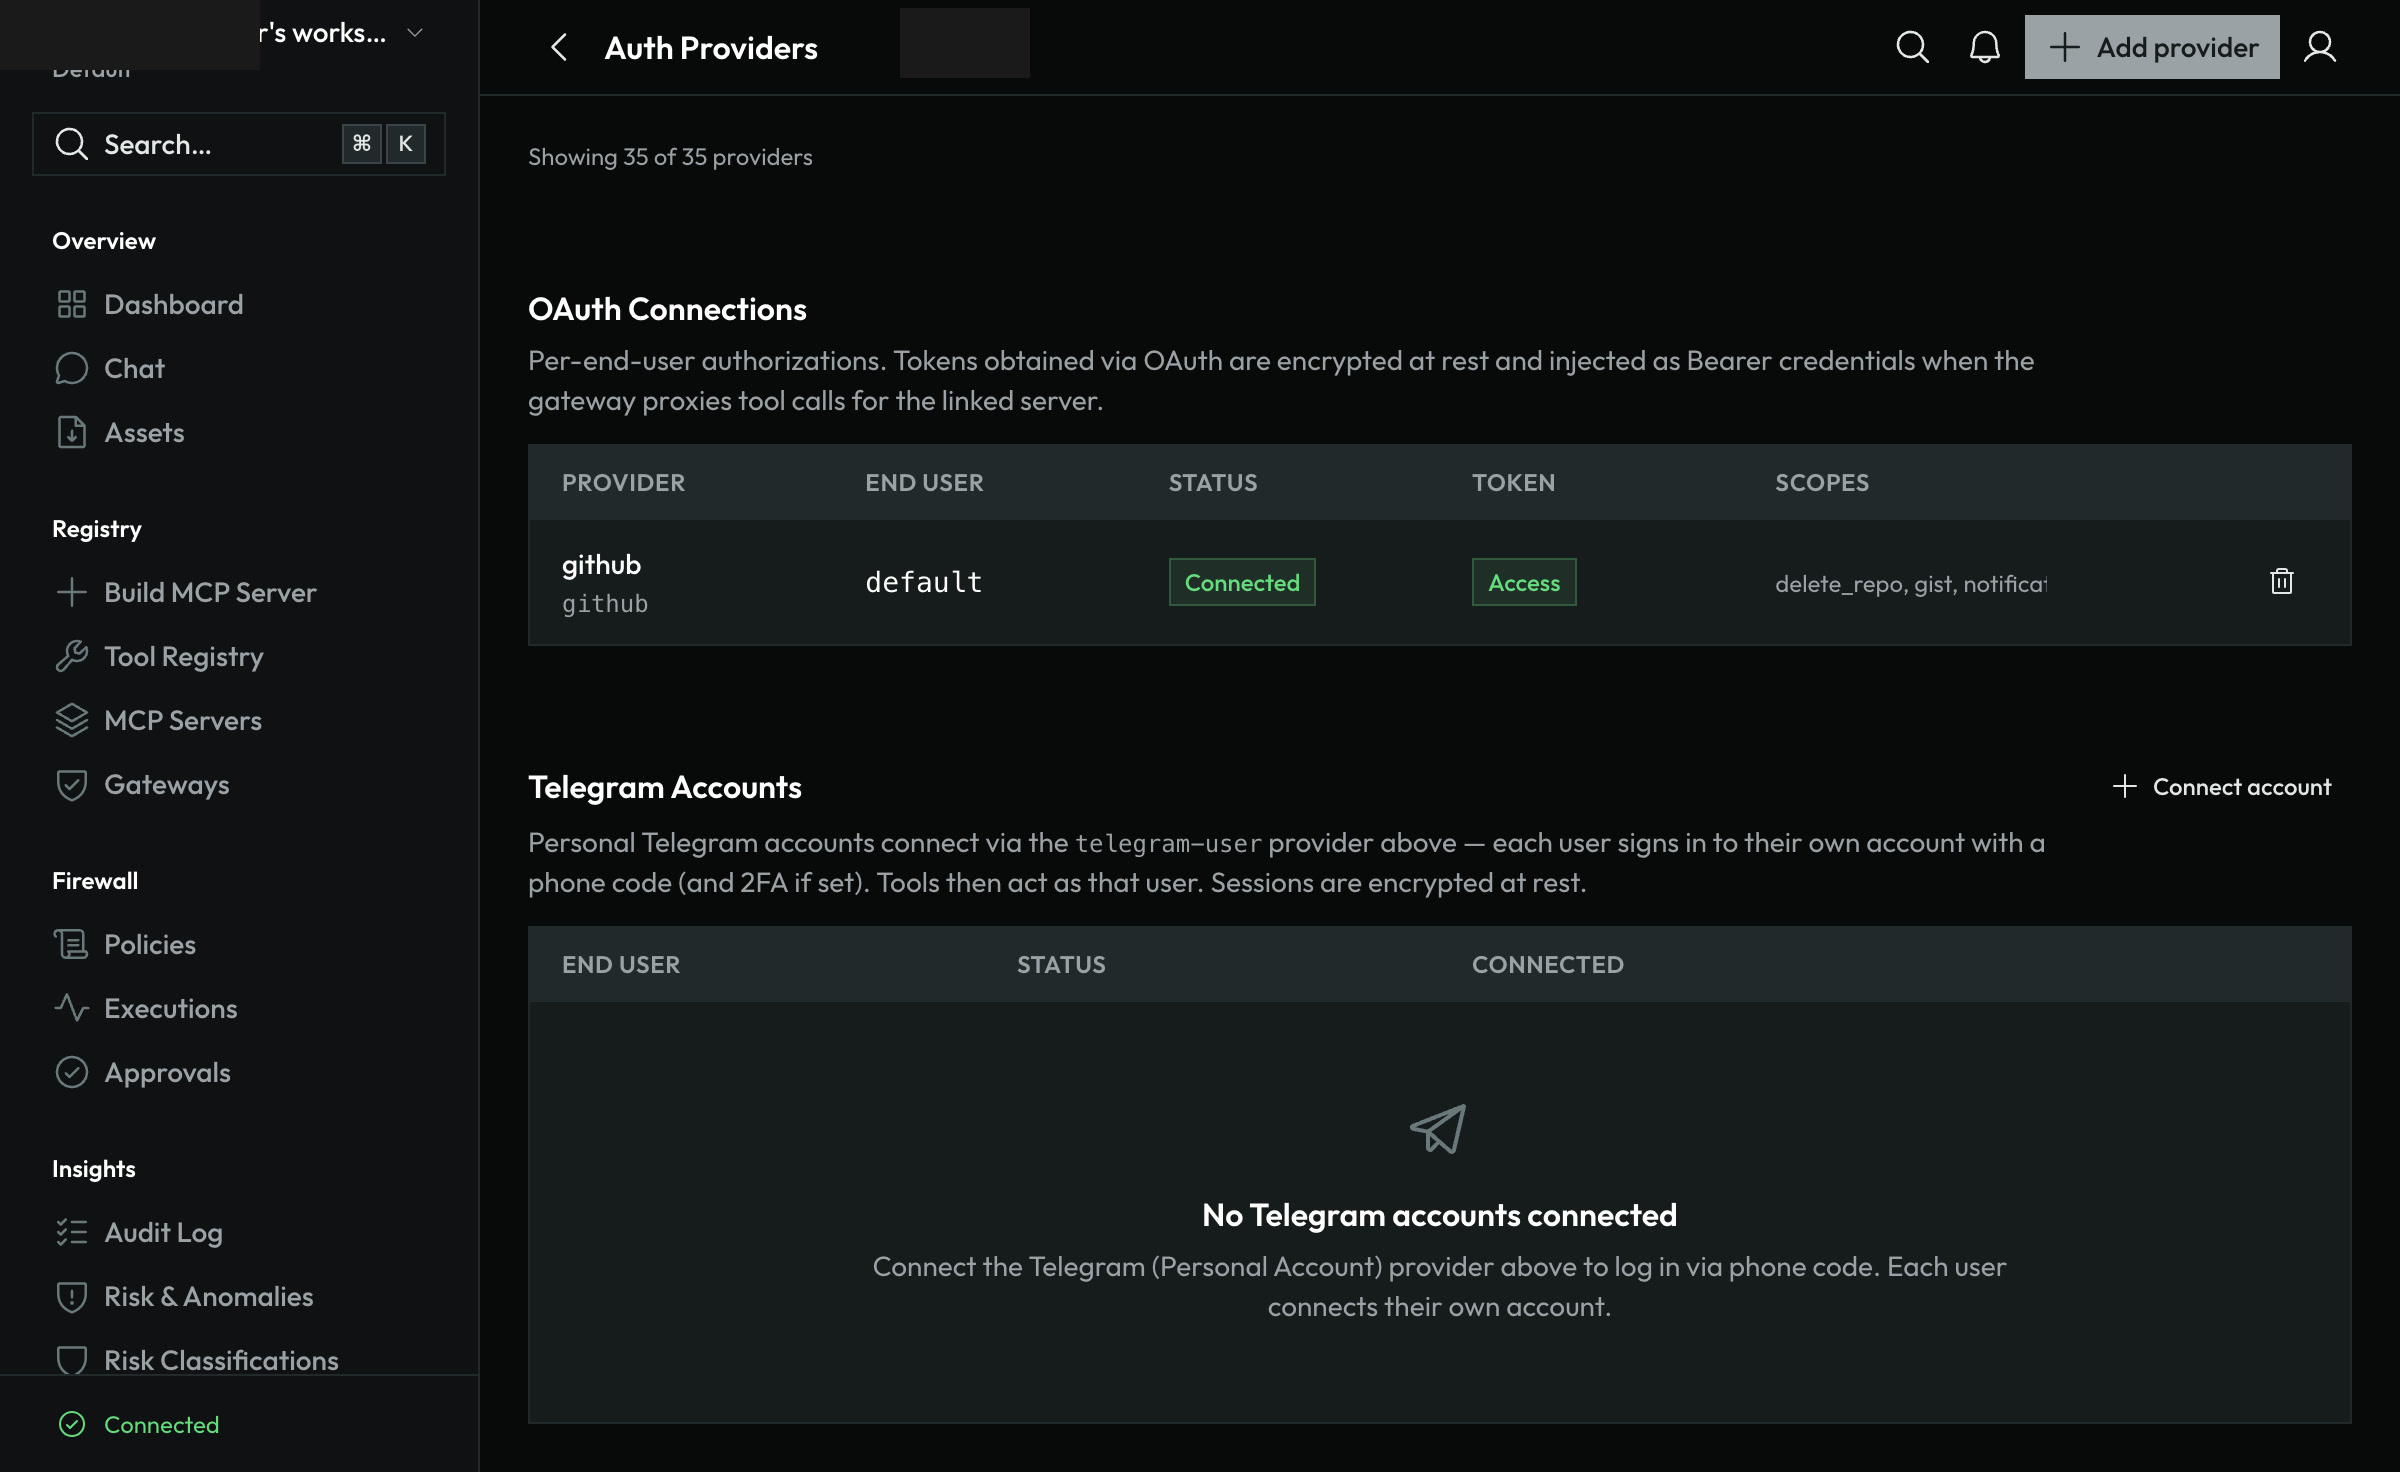
That's it — GitHub is connected.
Option 2 — Bring your own GitHub OAuth App
Use this path when your security team requires a first-party OAuth app, you want your own name on the GitHub consent screen, or you need credentials isolated from other Warden9 customers.
Step 1 — Create a GitHub OAuth App
Open GitHub → Settings → Developer settings → OAuth Apps → New OAuth App and fill in:
| Field | Value |
|---|---|
| Application name | Something identifiable, e.g. Warden9 — Acme Corp |
| Homepage URL | Your Warden9 dashboard URL or company site |
| Authorization callback URL | https://api.warden9.com/api/v1/oauth/callback |
If you run a self-hosted or custom API deployment, use your own API host instead:
https://<your-api-host>/api/v1/oauth/callback
The callback URL must match exactly what Warden9 will redirect to after authorization. Register the production URL even if you test locally first.
Click Register application. GitHub issues a Client ID immediately. Generate a Client secret on the next screen and copy both — you'll paste them into Warden9 once.
Step 2 — Paste credentials in Warden9
In the dashboard, go to Configuration → Auth Providers, find the GitHub row, and click Use your own.
The guided setup modal shows the callback URL to register in GitHub, step-by-step instructions, and fields for your Client ID and Client secret. Paste both and click Save credentials. Your BYO credentials take precedence over the platform default.
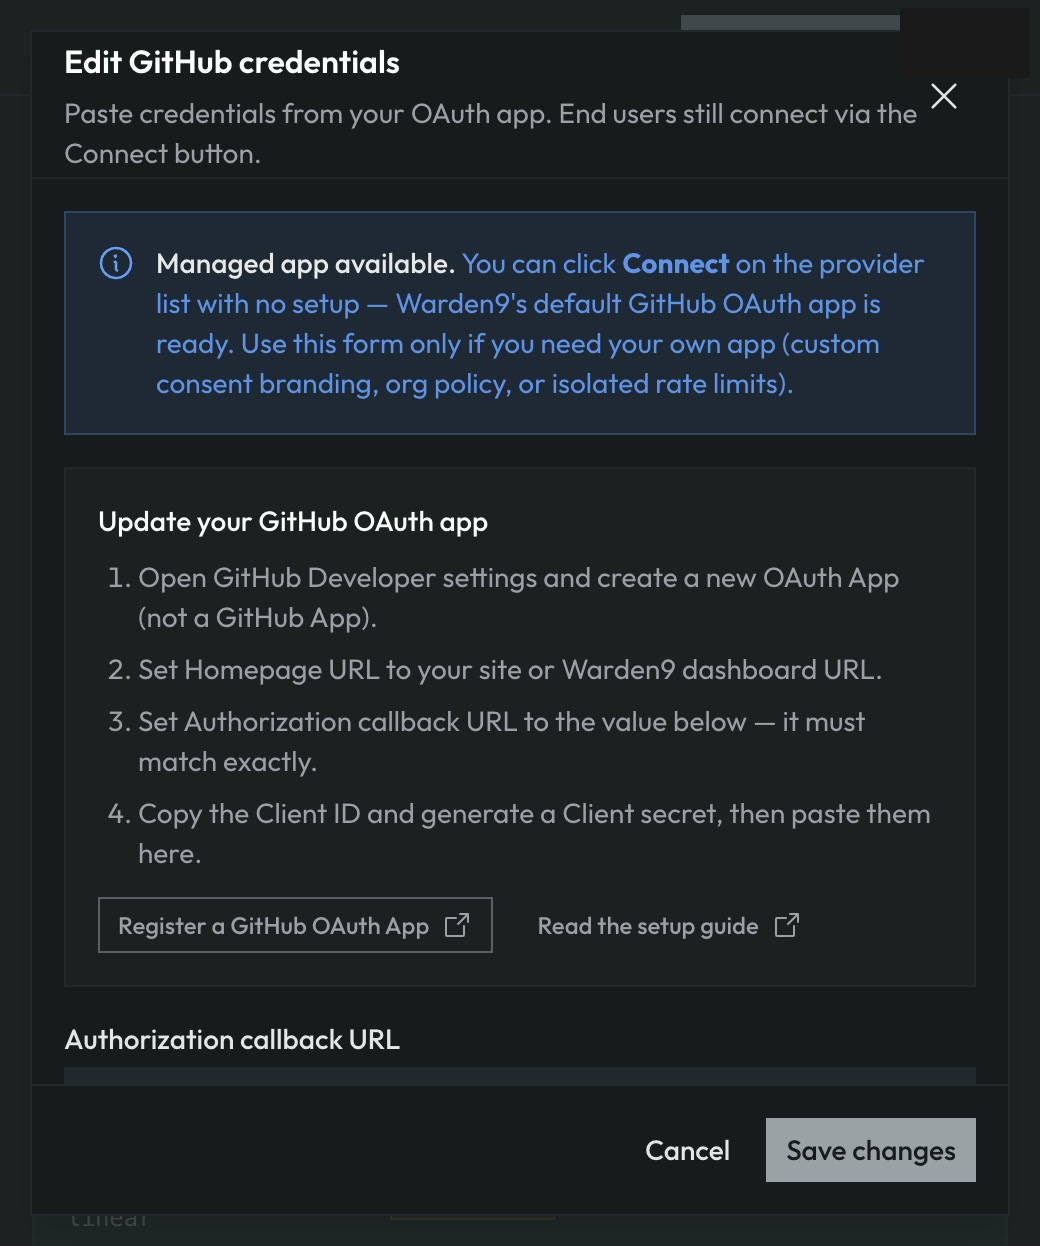
Step 3 — Connect
Click Connect on the GitHub row and complete the same end-user and authorization flow as Option 1. GitHub now shows your application name on the consent screen.
Scopes Warden9 requests
Warden9 requests the scopes your GitHub tools need. The full set registered for the GitHub provider is:
| Scope | Purpose |
|---|---|
repo |
Read and write repository contents, issues, pull requests, and metadata |
read:org |
Read organization membership and team structure |
read:user |
Read public and private profile information |
user:email |
Access the account's email addresses |
gist |
Create and manage gists |
workflow |
Update GitHub Actions workflow files |
notifications |
Access notifications |
repo_hook |
Manage repository webhooks |
delete_repo |
Delete repositories (governed by Warden9 policies) |
You approve these on GitHub's consent screen. Within Warden9, each tool call still runs through the risk classifier and policy pipeline — a broad OAuth grant does not mean unchecked agent access.
What happens to your tokens
This is the part that matters for security. When you connect GitHub:
- Tokens are encrypted at rest. Warden9 stores the access token encrypted; it is never written to logs or returned to the dashboard.
- The model never sees a credential. When an agent calls a GitHub tool, Warden9 injects the token as a
Bearercredential at the moment of the call, inside the runtime. The token never enters the prompt, the model's context, or your application code. - Every call is scoped and governed. Warden9 runs each tool call through its policy pipeline, so a connected account doesn't mean unchecked access — even for scopes like
delete_repo.
Disconnecting
To revoke access, open Auth Providers, find the connection under OAuth Connections, and click the trash icon. Warden9 removes the stored tokens immediately.
For belt-and-braces revocation, also remove the authorized application under GitHub → Settings → Applications → Authorized OAuth Apps (for managed) or revoke the OAuth App entirely (for BYO).
Frequently asked questions
Should I use managed or bring my own credentials?
Start with managed — it's zero setup and works out of the box. Switch to BYO when you need your company name on the GitHub consent screen, want credentials isolated from other tenants, or your security policy requires a first-party OAuth app registered under your GitHub org.
If I configure BYO credentials, does the managed app still get used?
No. Your own client_id and client_secret always take precedence over the platform-managed default.
Can agents access organization repositories?
Yes, as long as the connected GitHub account has access to those repos. The read:org scope lets Warden9 read org membership; individual repo access still follows GitHub's normal permission model for that user. If a repo is private and the user isn't a collaborator, the agent cannot reach it.
Does the agent ever see my GitHub password or token?
Never. Authentication happens entirely on GitHub's side, and the resulting token is held encrypted by the Warden9 runtime. The model only ever asks the runtime to make a call — it never handles the credential.
Can I connect more than one GitHub account?
Yes. Connections are per-end-user, so each of your users connects their own GitHub account and agents act as the correct person for each request.
Want to see governed agents acting on GitHub in production? Start free or
book a demo.