Guides, Integrations, Vercel
How to connect Vercel to Warden9

Warden9 ships Vercel as a built-in integration with 33 tools covering projects, deployments, environment variables, custom domains, DNS records, aliases, teams, and legacy secrets. Connecting it gives your agents governed access to your Vercel account — every call risk-classified and policy-checked — without ever handing the model a credential.
Vercel authenticates with a single API token. The flow has two halves: first you generate a token in the Vercel dashboard, then you paste it into Warden9 once. This guide walks through both. It takes under two minutes.
Before you start
You'll need two things:
- A Warden9 workspace you can sign in to. If you don't have one yet, start free.
- Access to your Vercel account, with permission to create a personal access token at Account Settings → Tokens.
A word on credentials before we begin: don't paste an existing token or one shared with another service. Create a dedicated, named token with a clear expiration so you can rotate or revoke it later without collateral.
Part 1 — Create a Vercel API token
Step 1 — Open Account Settings → Tokens
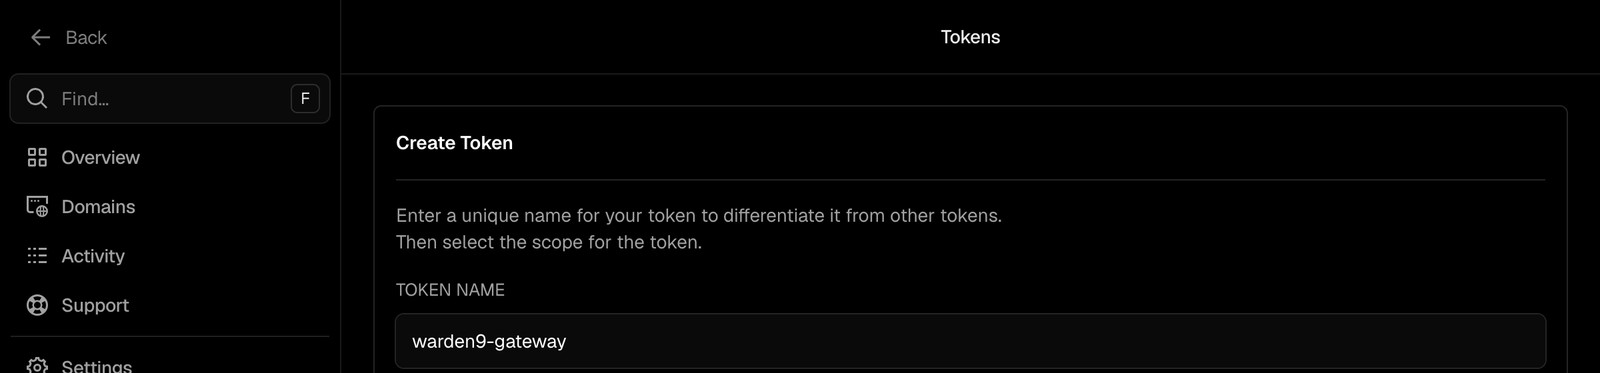
In the Vercel dashboard, open the account menu and go to Settings → Tokens. The page has a Create Token card where you name the token and choose its scope.
Step 2 — Name the token and choose a scope
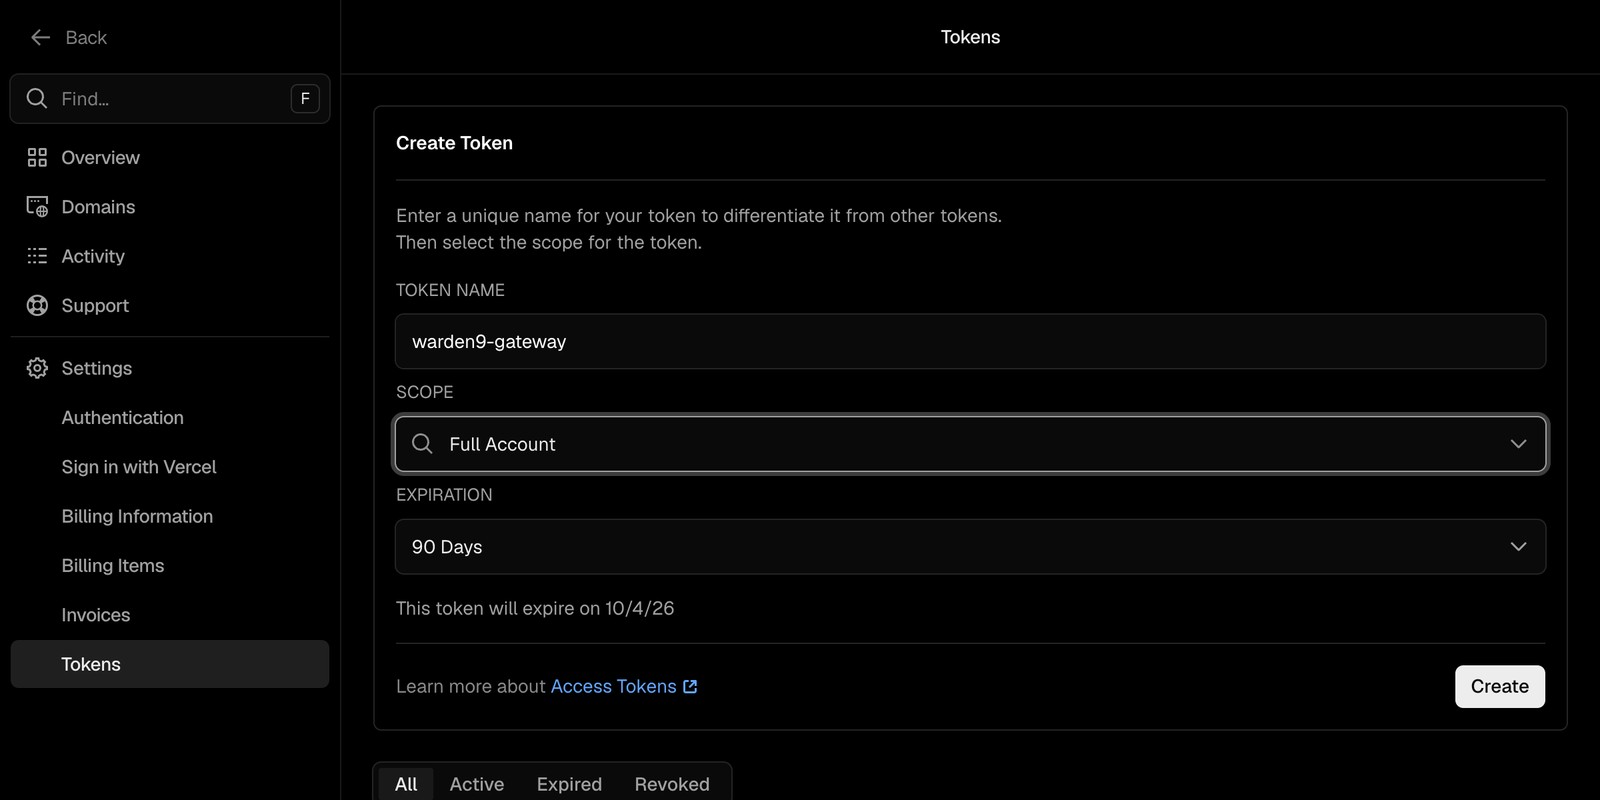
Give the token a clear name like warden9-gateway. For Scope, choose the Vercel account or team you want agents to manage. For a personal account, select your own projects scope; for a team, pick the team scope.
Warden9 only needs the token to call the Vercel REST API; it does not need console access or any OAuth flow.
Step 3 — Set an expiration
Set Expiration to whatever your security policy requires — 90 days is a good balance. The page will show the exact expiry date before you create it. Avoid No Expiration unless you have a specific reason, because a rotating credential is easier to revoke cleanly.
Step 4 — Create and copy the token
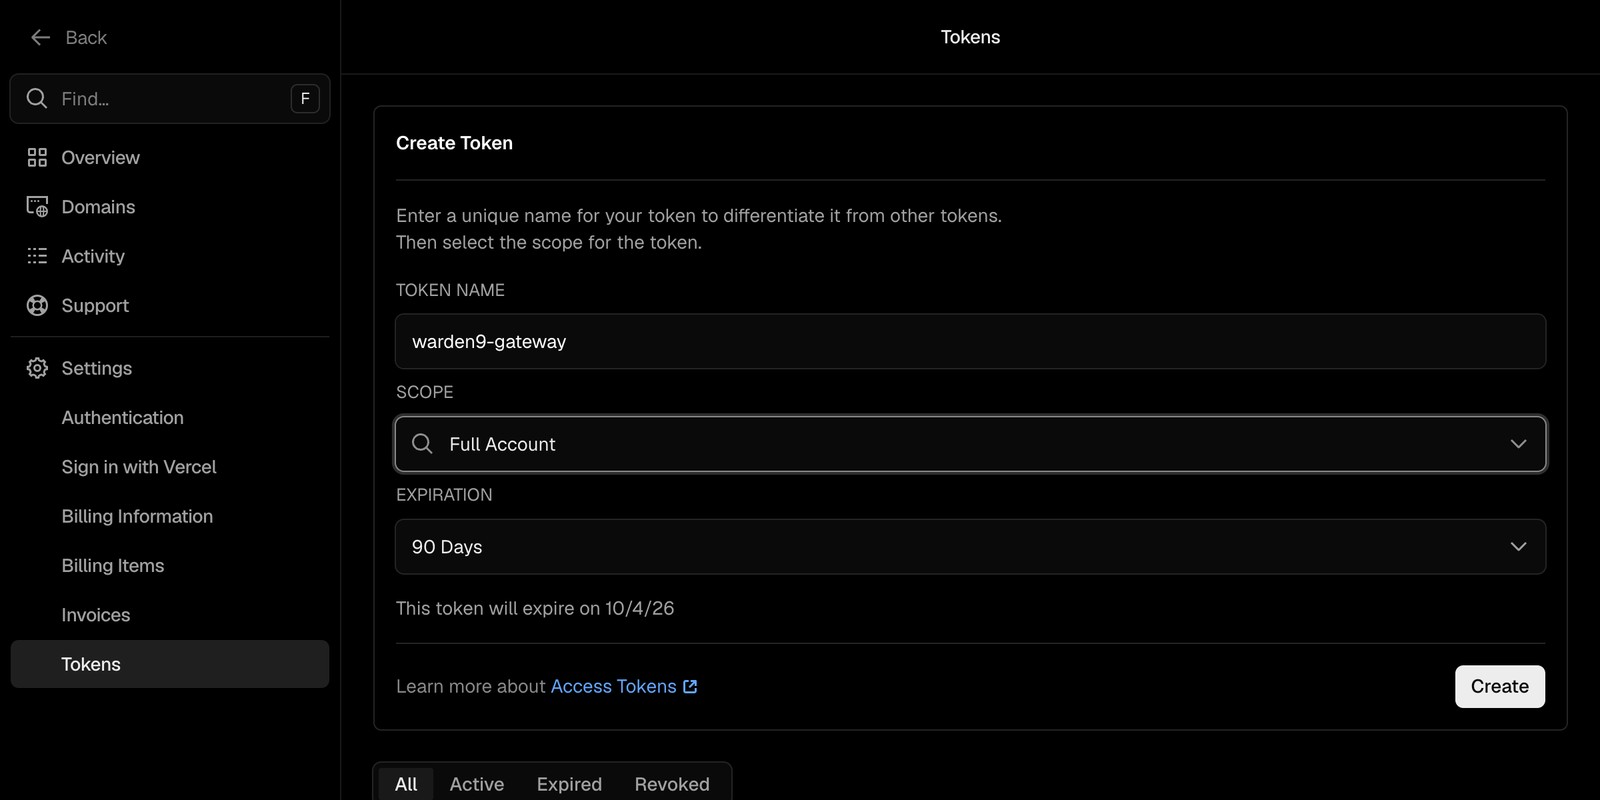
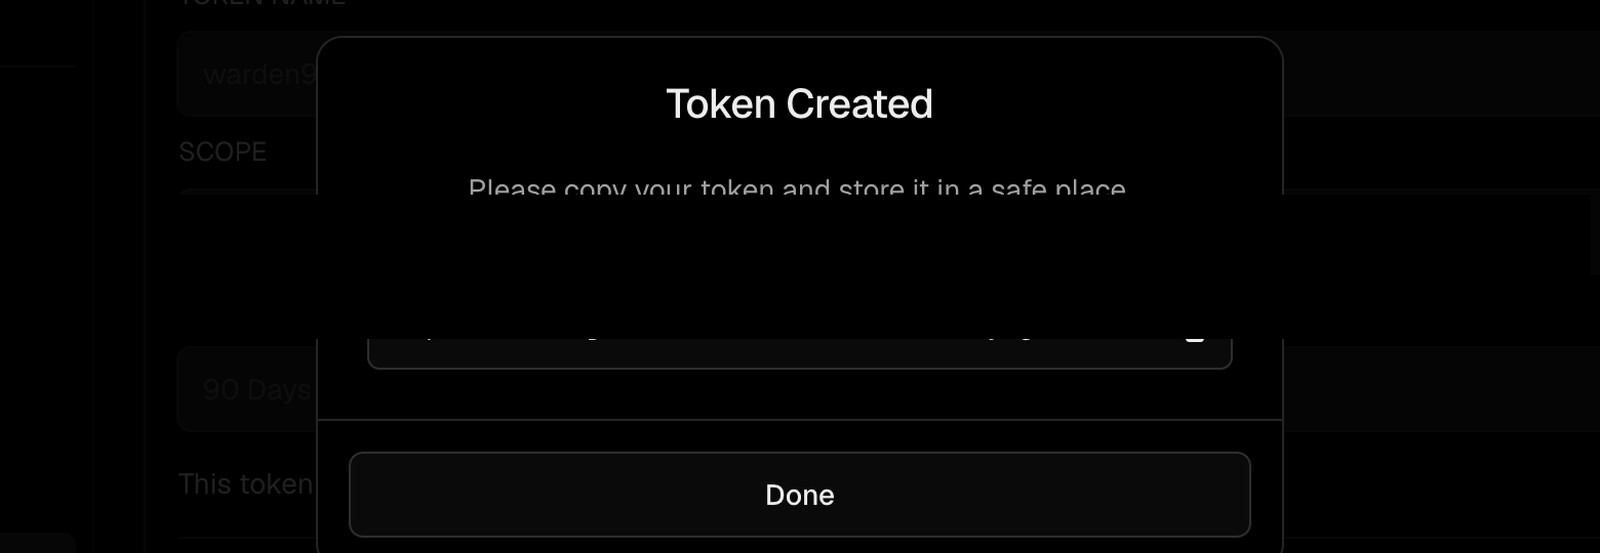
Click Create. Vercel shows the token value once in a modal — this is the only time you'll see it.
Copy it immediately and store it somewhere safe (a password manager, or briefly in your clipboard for the next step). If you lose it, the only recovery is to revoke the token and generate a new one.
Part 2 — Connect Vercel in Warden9
Step 5 — Open the Connect Vercel dialog
In the Warden9 dashboard, open a Gateway (create one if you don't have one yet — it's the governed MCP endpoint your agents point at). In the gateway composer, search the built-in integrations for Vercel and click Add.
The Connect Vercel dialog opens. It tells you the integration needs a VERCEL_API_TOKEN, and that the token is encrypted at rest and never exposed.
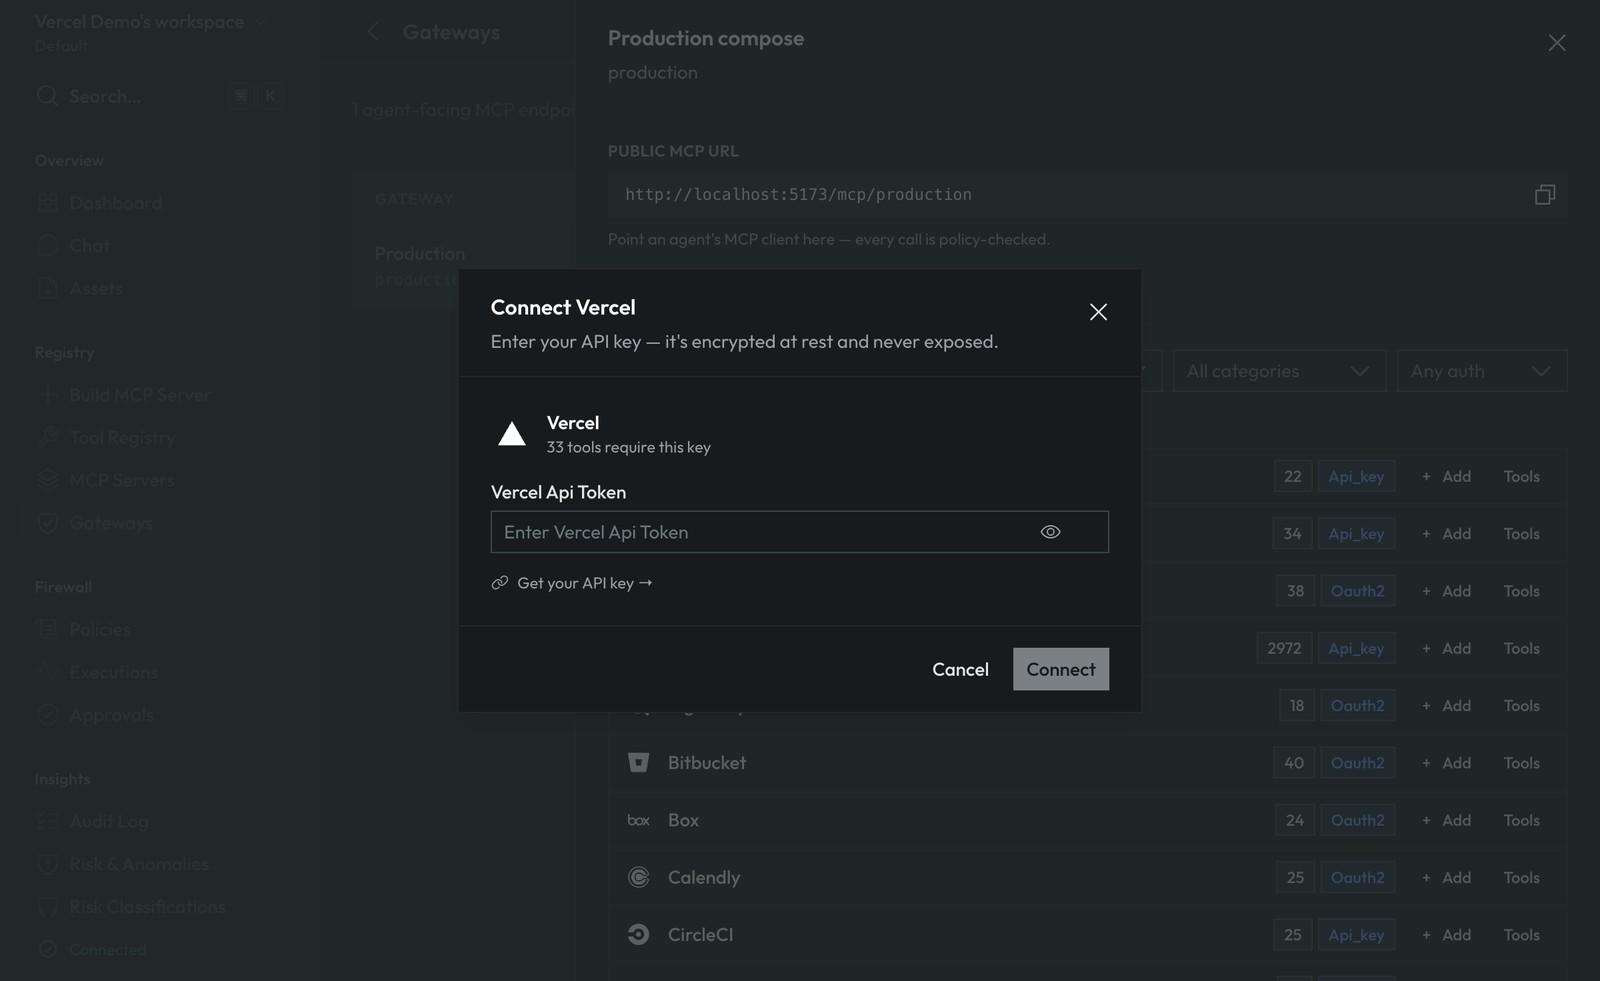
Step 6 — Paste the token
Paste the token from Step 4 into the Vercel Api Token field. The field is masked by default, and Warden9 encrypts it at rest — it's never shown again or returned to the dashboard.
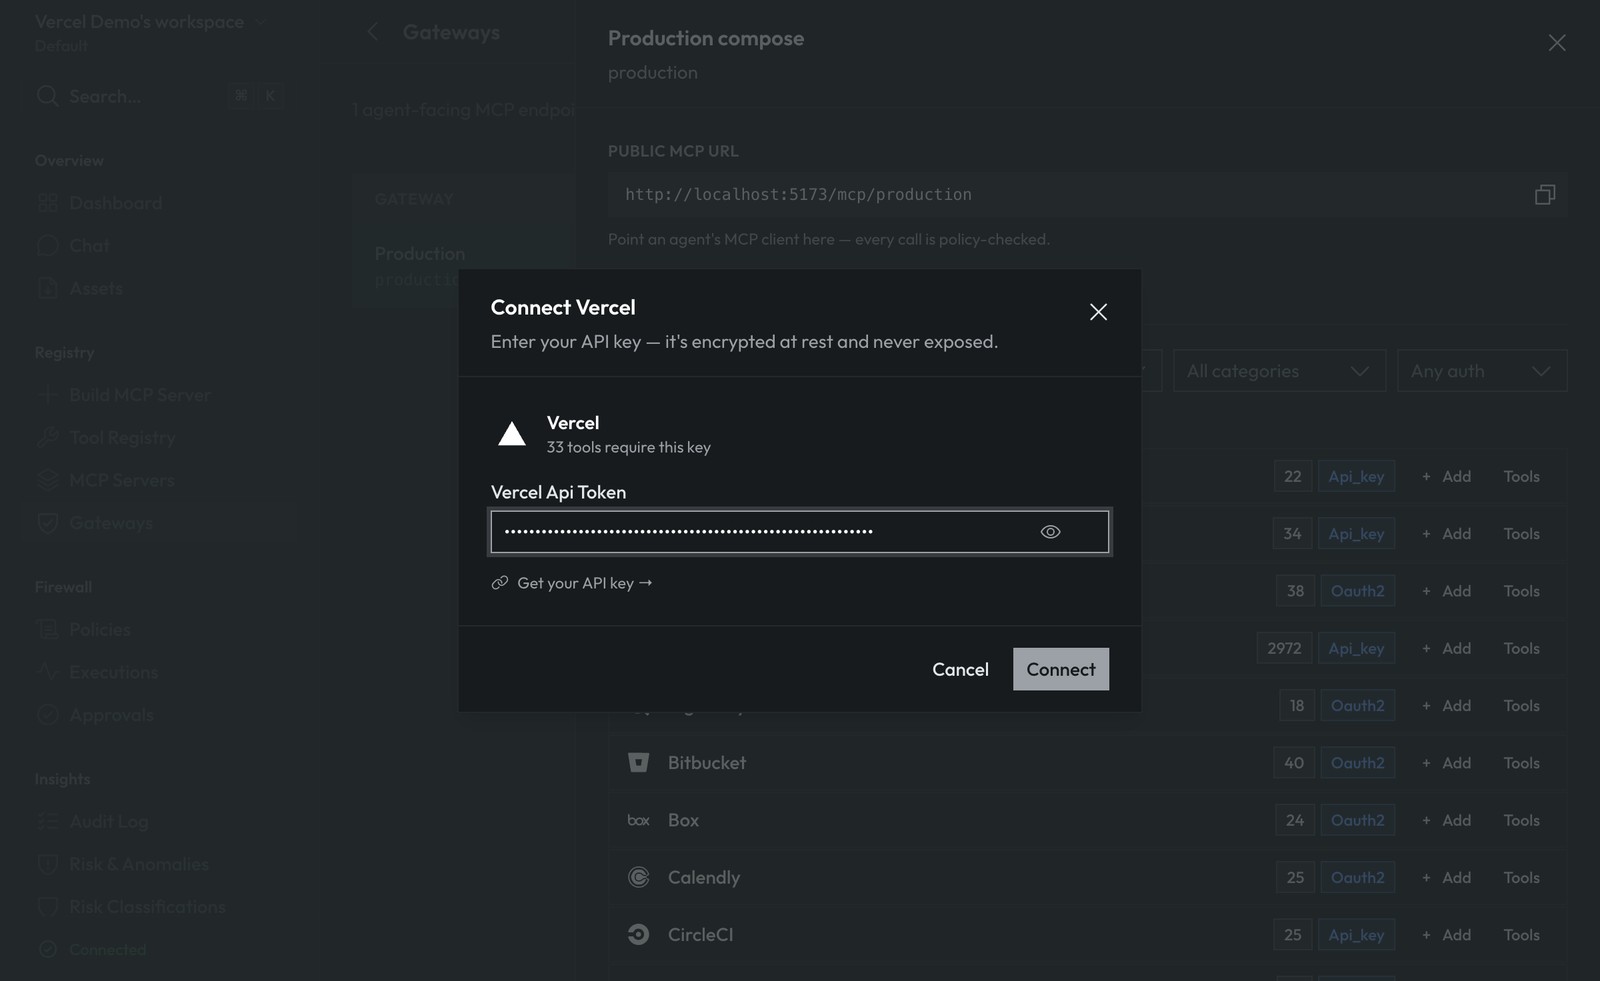
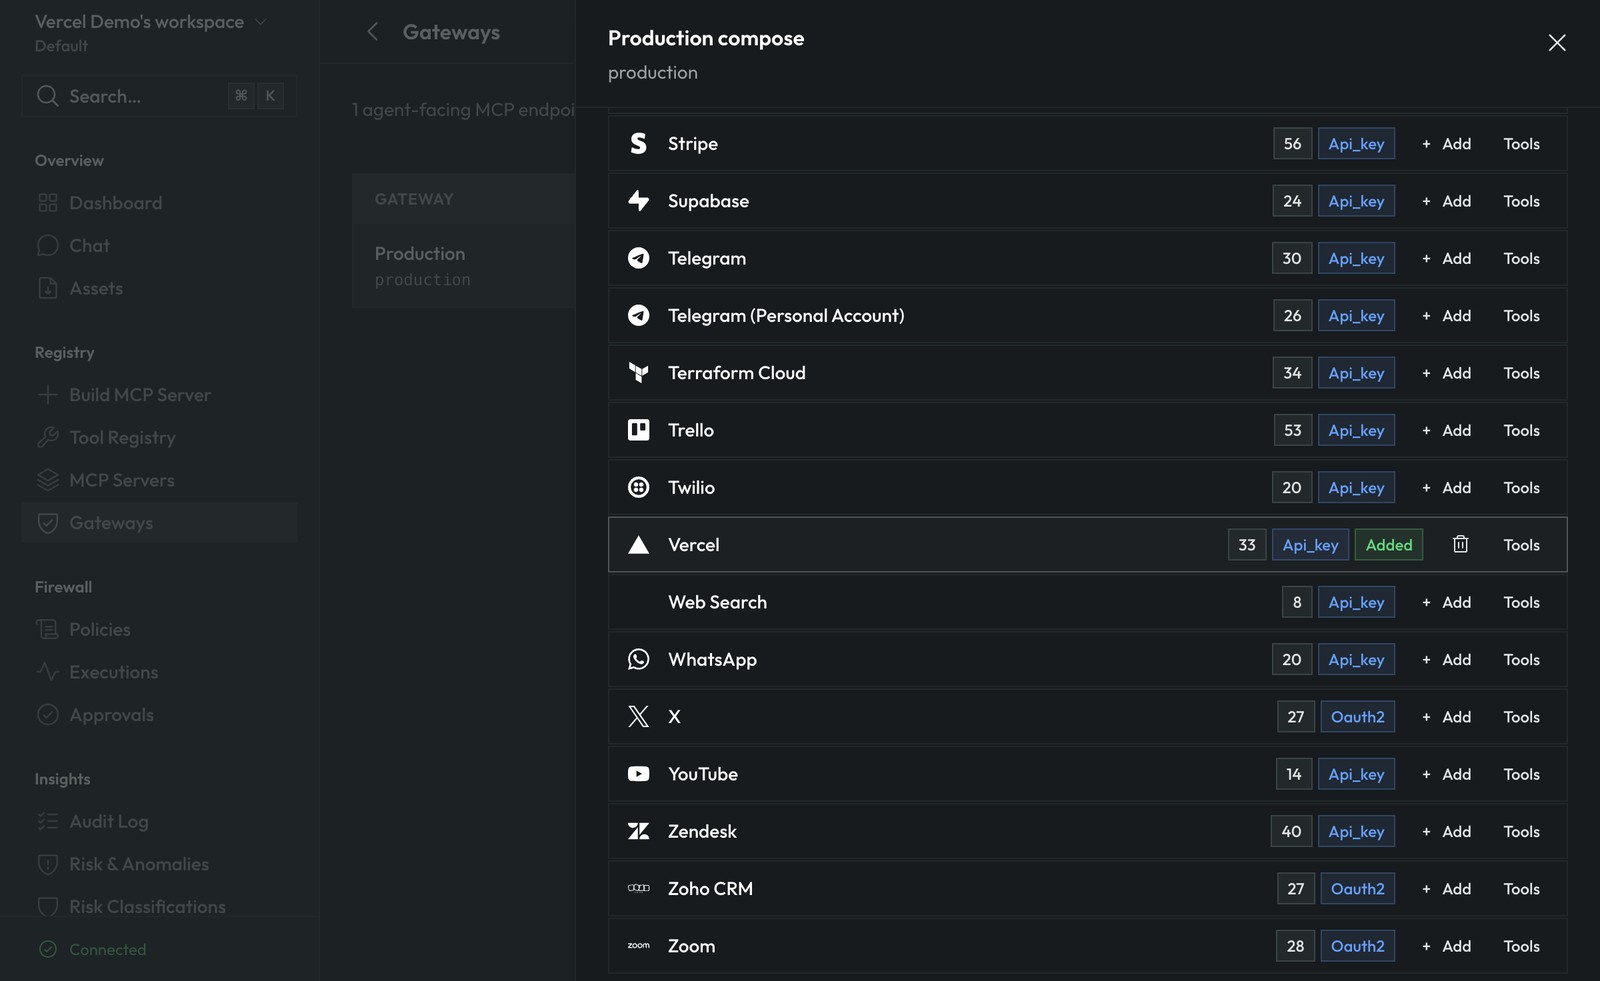
Step 7 — Connect and confirm
Click Connect. Warden9 validates the token against Vercel's /v6/user endpoint and, on success, adds Vercel to your gateway with an Added badge and its full tool count.
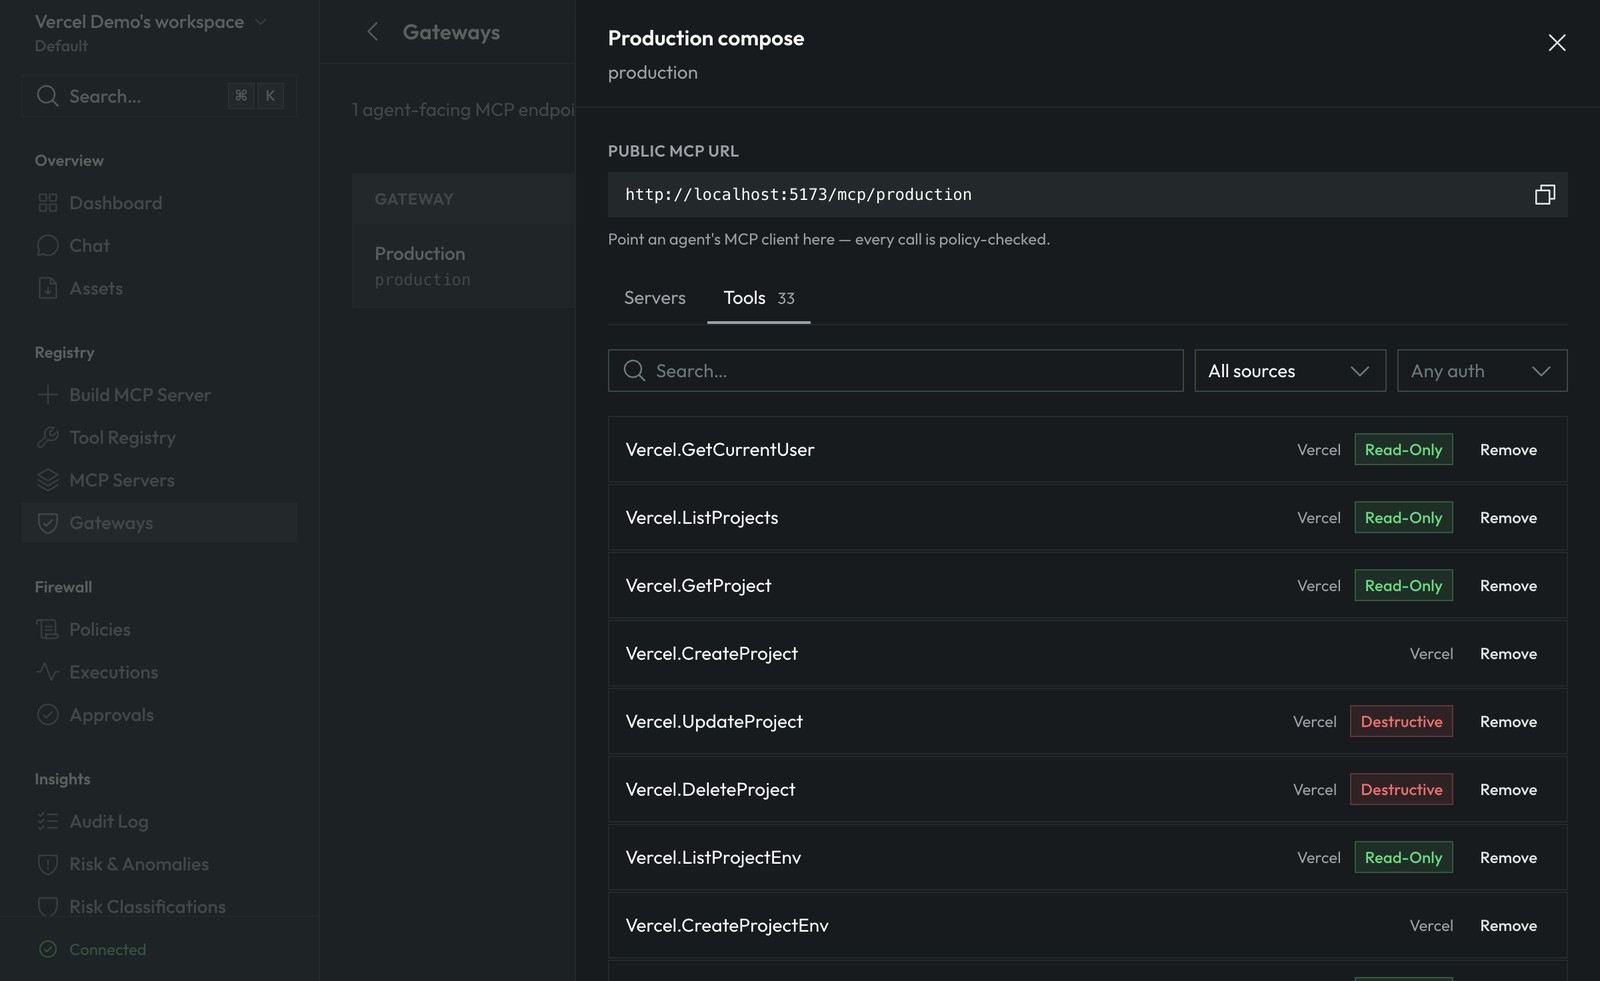
Open the Tools tab and you'll see all 33 Vercel actions, each already risk-classified. Read-only calls like GetCurrentUser and ListProjects are tagged Read-Only, while mutating or destructive calls like DeleteProject are tagged Destructive so your policies can require approval before they run.
That's it — Vercel is connected.
What happens to your token
This is the part that matters for security. When you connect Vercel:
- The token is encrypted at rest. Warden9 stores your
VERCEL_API_TOKENencrypted; it is never written to logs or returned to the dashboard. - The model never sees a credential. When an agent calls a Vercel tool, Warden9 injects the token into the outbound request at the moment of the call, inside the runtime. The token never enters the prompt, the model's context, or your application code.
- Every call is scoped and governed. Your Vercel token's permissions cap what can be done at the Vercel layer, and Warden9 runs each tool call through its risk classifier and policy pipeline — so a connected account never means unchecked access.
Disconnecting
To revoke access, remove the Vercel integration from the gateway in Warden9 — the stored token is deleted immediately. For a belt-and-braces revoke, also delete or revoke the warden9-gateway token on the Vercel Tokens page.
Frequently asked questions
Do I need to give Warden9 full account access?
No. Warden9 uses whatever scope the token has. Create the token scoped to only the account or team you want agents to manage. Within Warden9, you can further restrict which tools are allowed through policies and approvals.
Which Vercel resources can agents access?
Projects, deployments, environment variables, custom domains, DNS records, aliases, teams, and legacy secrets — 33 tools in total. Warden9 classifies each tool's risk so you can allow, deny, or require approval per action.
Does the agent ever see my Vercel token?
Never. The token is held encrypted by the Warden9 runtime and used only to authorize outbound Vercel API requests at call time. The model only ever asks the runtime to make a call — it never handles the credential.
What if my token expires?
The connection will start failing with 401 or 403 errors. Open the gateway composer, remove the old Vercel integration, generate a fresh token in Vercel, and add Vercel again with the new token. No other configuration changes.
Can I use a team token instead of a personal token?
Yes. As long as the token is valid for the Vercel REST API and has the scopes the tools need, Warden9 will accept it. Pick the team scope when creating the token if you want agents to manage team projects.
Want to see governed agents acting on Vercel in production? Start free or
book a demo.